Craft a Stained Glass Book Set Full of Radiance part 2
1. Assembling the First Book in the Stack
This stained glass books set is the second part of our 3D vertical stack project. If you haven’t seen the first book yet watch here.
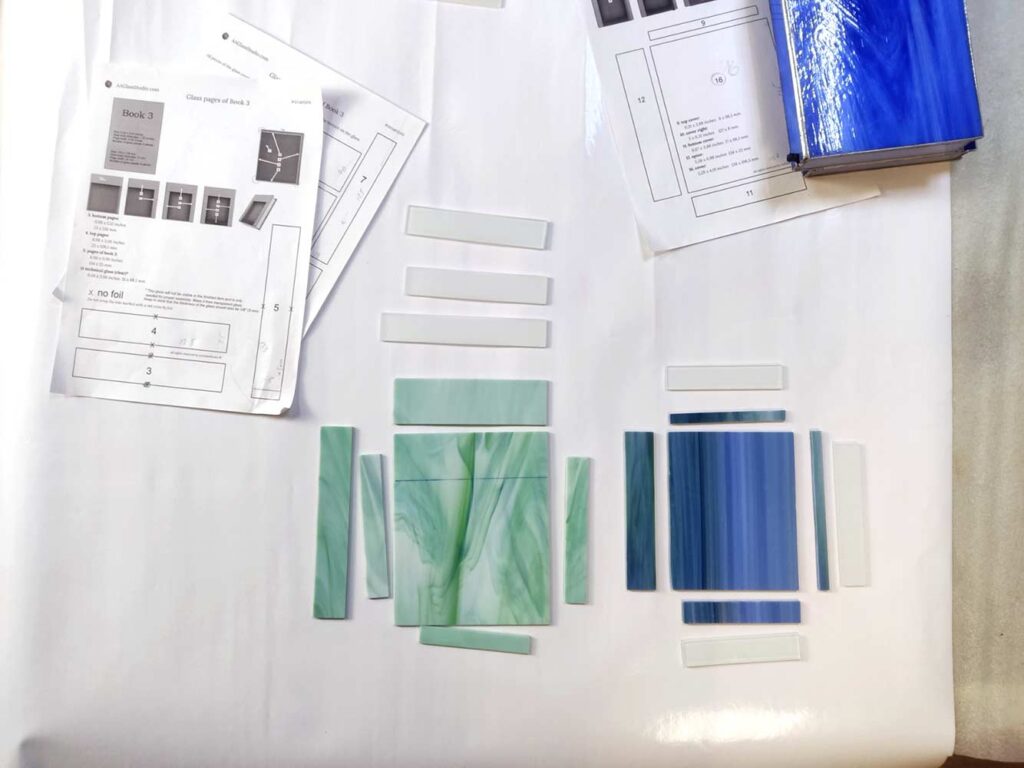
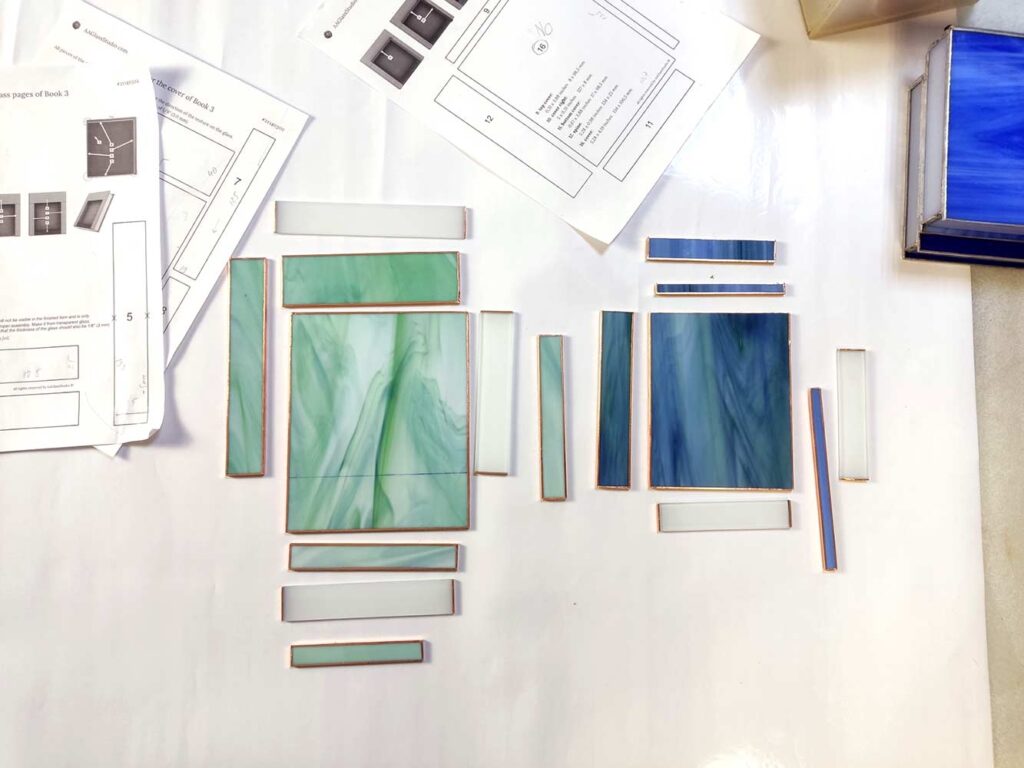
1.1 Cutting the Glass and Wrapping with Foil
Print the 3D book pattern and cut the glass pieces according to it for the project. Aim to cut precisely, maintaining accurate rectangular geometry in each piece. Grind the edges smooth and wrap them with copper foil, but only on the side of the glass without the red cross mark. This technique ensures that the 3D book stack will look more attractive in its final form.
1.2 Starting the Assembly of Book 3
Repeat the steps from the first part of the instructions. First, tack the cover and spine of the book together with three solder drops. Pay attention to how the glass pieces should be positioned relative to each other.
If you’re making a nightlight, don’t forget to attach the LEDs to the inner side of the spines of Books 3 and 4. Immediately solder the wires to the LED strip, marking the “+” wire, and create a power connector where necessary.
This part of the instruction will cover the specific assembly details of these two books later. For now, the process is similar to the assembly in the first part of the instructions.
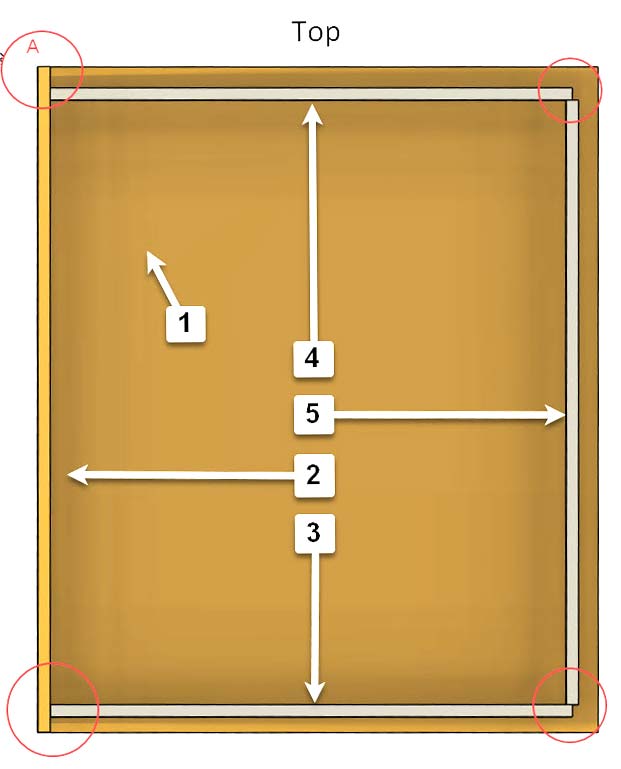
Note how the spine aligns with the cover, marked as “A”. Refer to the diagram below in section 1.3.

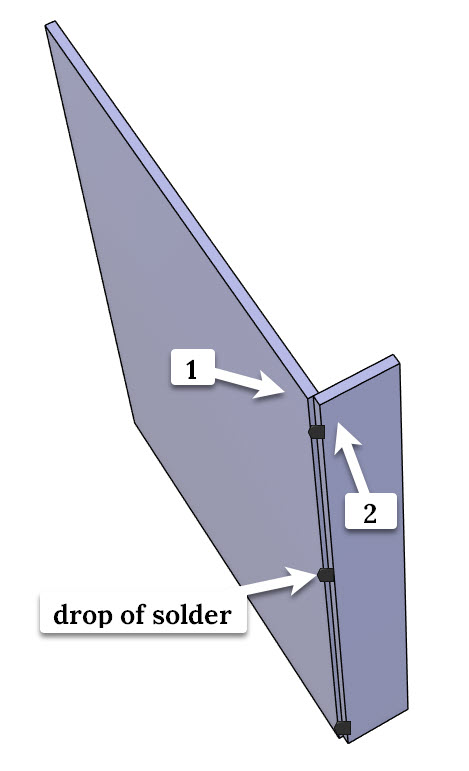
There’s no need to rush and fully solder the seam just yet. First, we’ll tack everything in place, and after ensuring there are no errors, we’ll proceed to solder all the seams.
1.3 Assembling the Pages of the Book
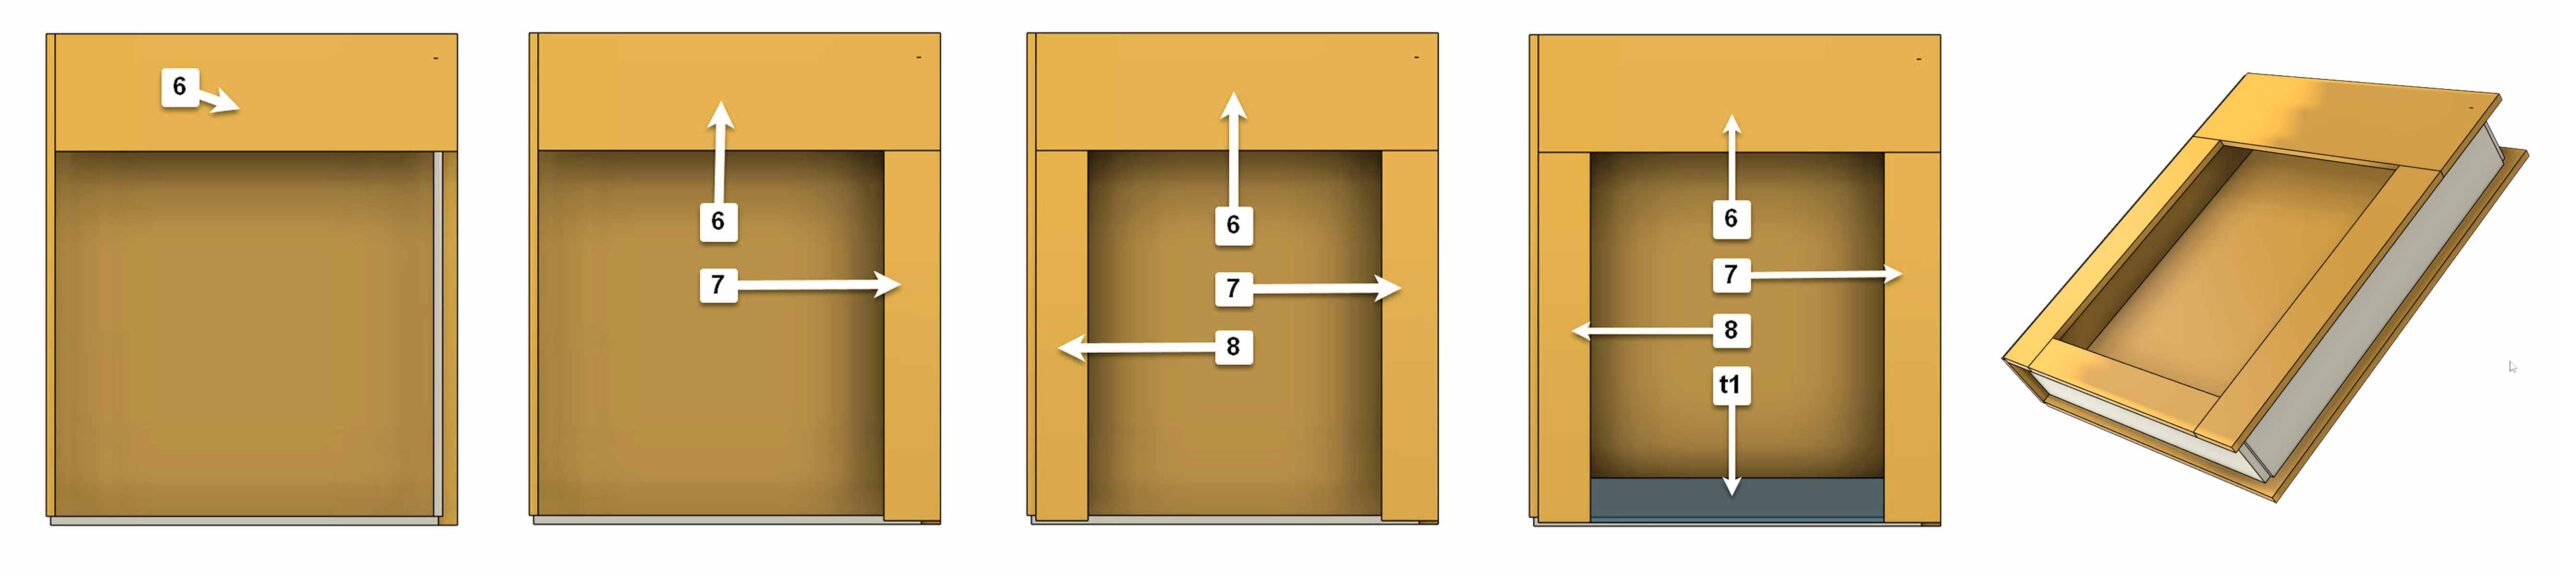
Place the cover glass #1 face down on the table, with the back side facing you. The spine of Book #2 has already been tacked and is facing upwards. Position piece #3 halfway along the thickness of the spine of Book #2 and tack it in place. This will make it easier to position the glasses numbered #4 and #5. Double-check the correct placement of the glass pieces according to the diagram. Control points are marked with red circles. Secure them with solder drops as you did before.
Once you’ve confirmed that all the geometry aligns and you’re satisfied with the result, proceed to fully solder all the seams.
1.4 Assembling the Second Half of Book 3
Begin laying out the cover glasses for Book 3 and tack them in place with solder drops. The sequence of placement is shown in the diagram.
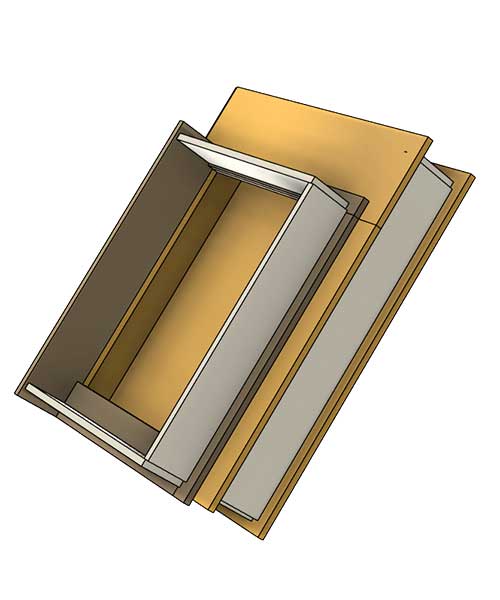
After ensuring that all the geometry aligns and you’re happy with the result, solder all the seams before moving on to the next step.
2. Assembling the Second Stack of Books
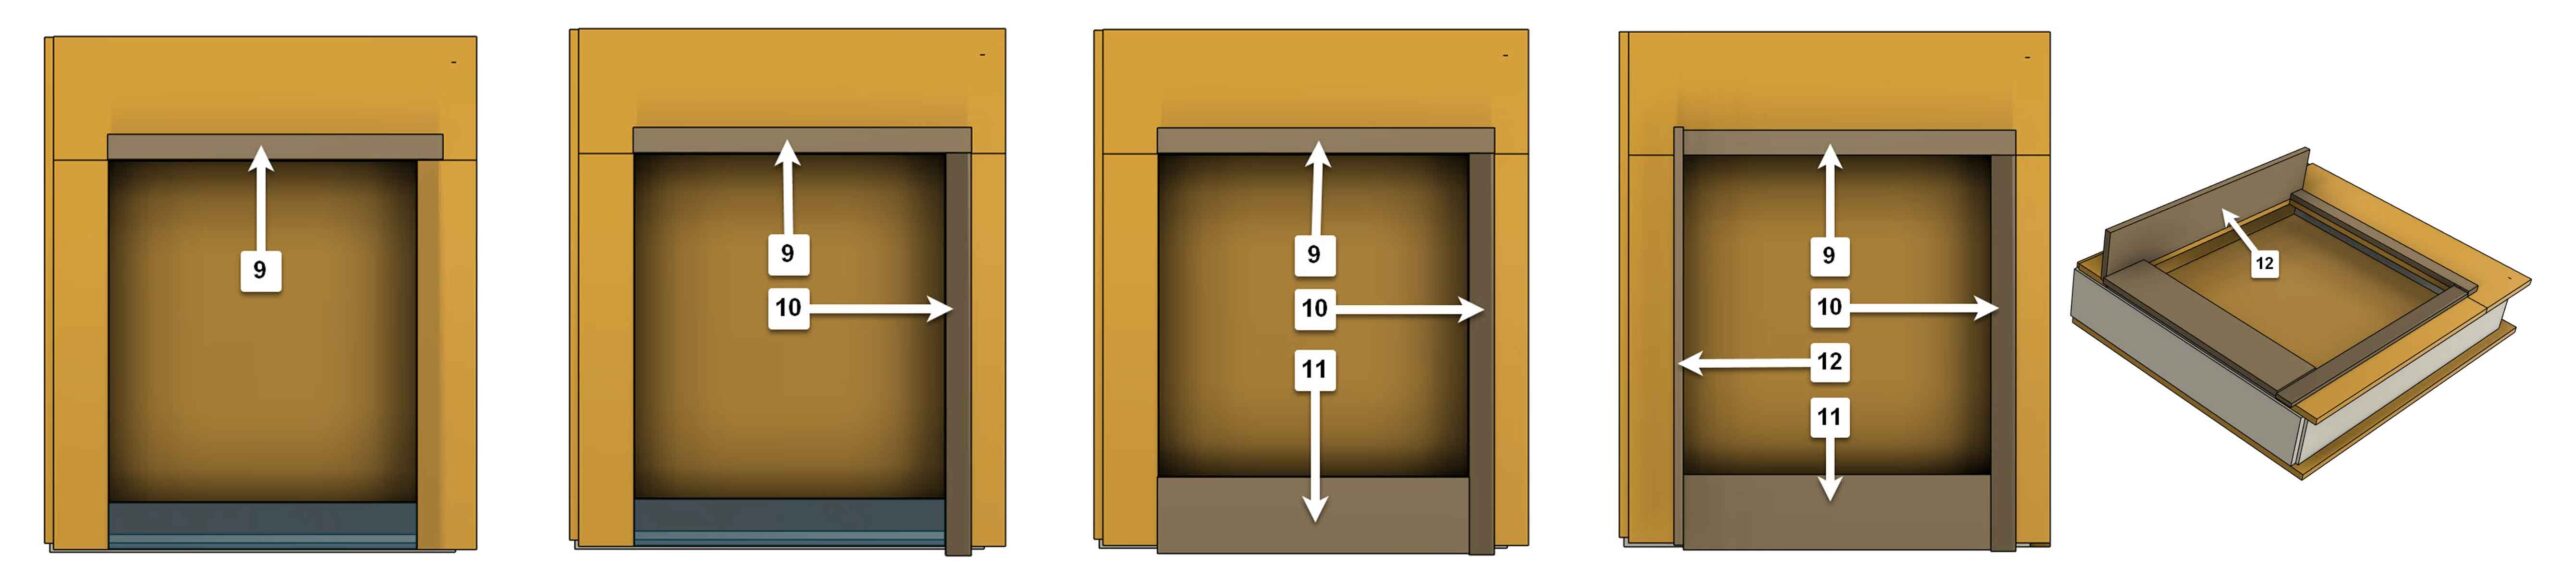
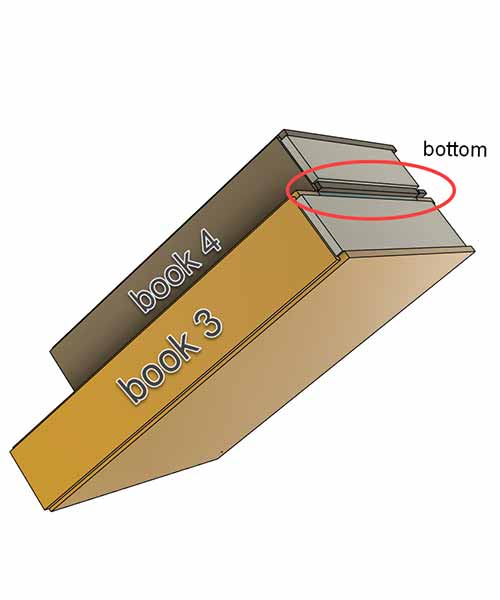
Lay out the cover glasses for Book 4 on top of the completed Book 3.
That’s correct—Book 4 extends slightly below Book 3. This is necessary so that when this stack of books is tilted, both books touch the base surface on which the 3D book stack will stand. Therefore, piece #10 protrudes slightly below Book 3. Align piece #11 with the bottom edge of piece #10.
2.1 Assembling the Pages of Book 4
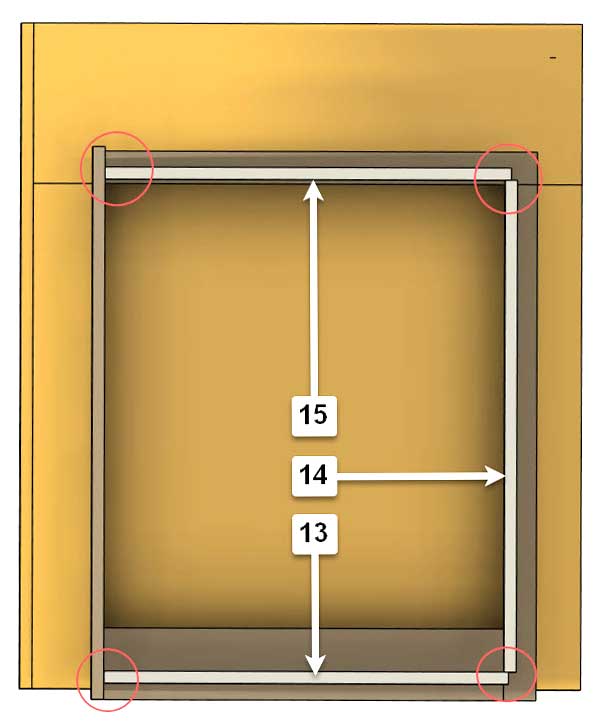
Start assembling the pages with piece #13, then position pages #14 and #15, checking their placement against the diagram. Control points are marked with red circles.

2.2 Decorating the Cover of Book #4
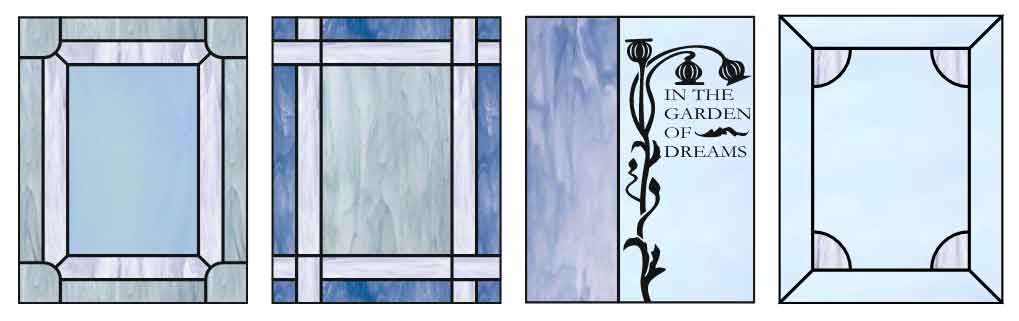
By using your creativity, you can design any interesting cover you want for your project. We’ve created four cover designs for Book 4 (the smallest book). One of these designs is for vinyl cutting on a Cricut. All these designs come with PNG and SVG files. They can be purchased as an additional option within the main product listing. Simply select the desired design and add it to your cart.
Love stained glass? Join us on Facebook for behind-the-scenes videos, clever tricks, and inspiring techniques we use in every project. Follow now and spark your creativity!
3. Combining the Two Projects
The versatility of this project allows you to combine the book stacks in various ways.
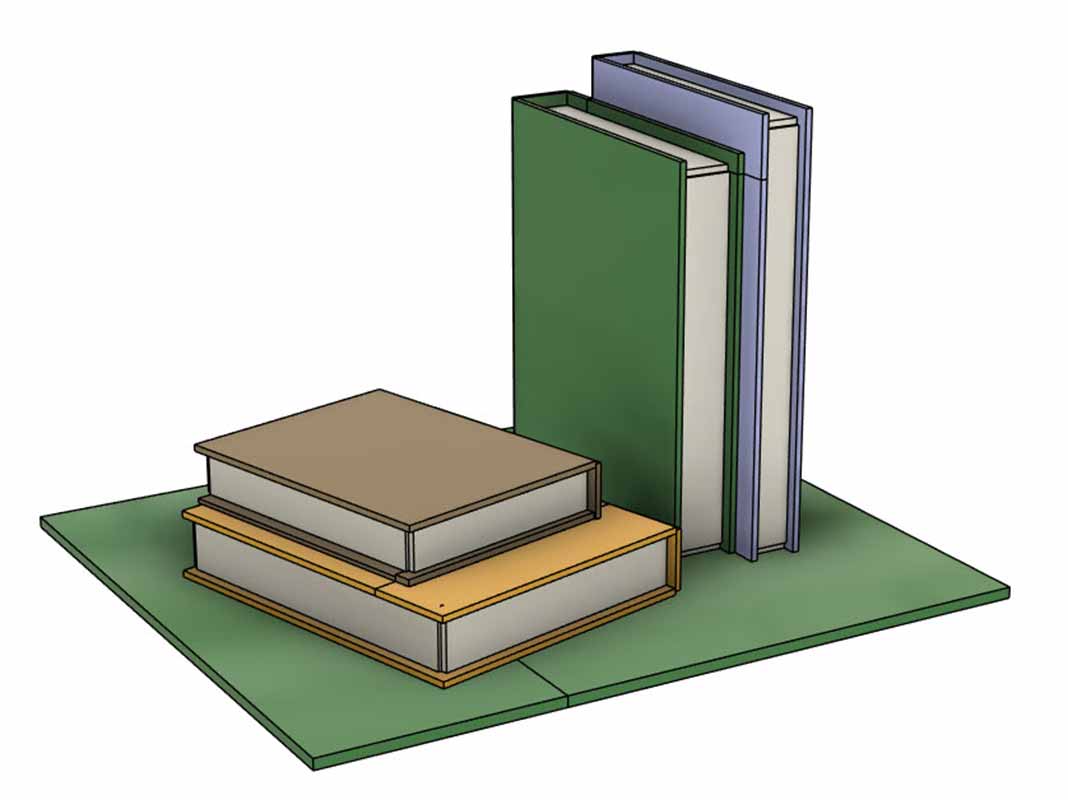
3.1 Vertical Option
The first way to combine the two stacks is vertically. Books #3 and #4 are attached at an angle to the stack of Books #1 and #2. This can be done either with glue or by soldering. Apply a small piece of foil at the point of contact and tack it with solder.

3.2 Vertical + Horizontal Combination
The second option involves placing the vertically standing stack of Books #1 and #2 alongside the horizontally laid stack of Books #3 and #4.
3.3 Book Stack Option
Simply stack Books #1, #2, #3, and #4 together into a single pile.
