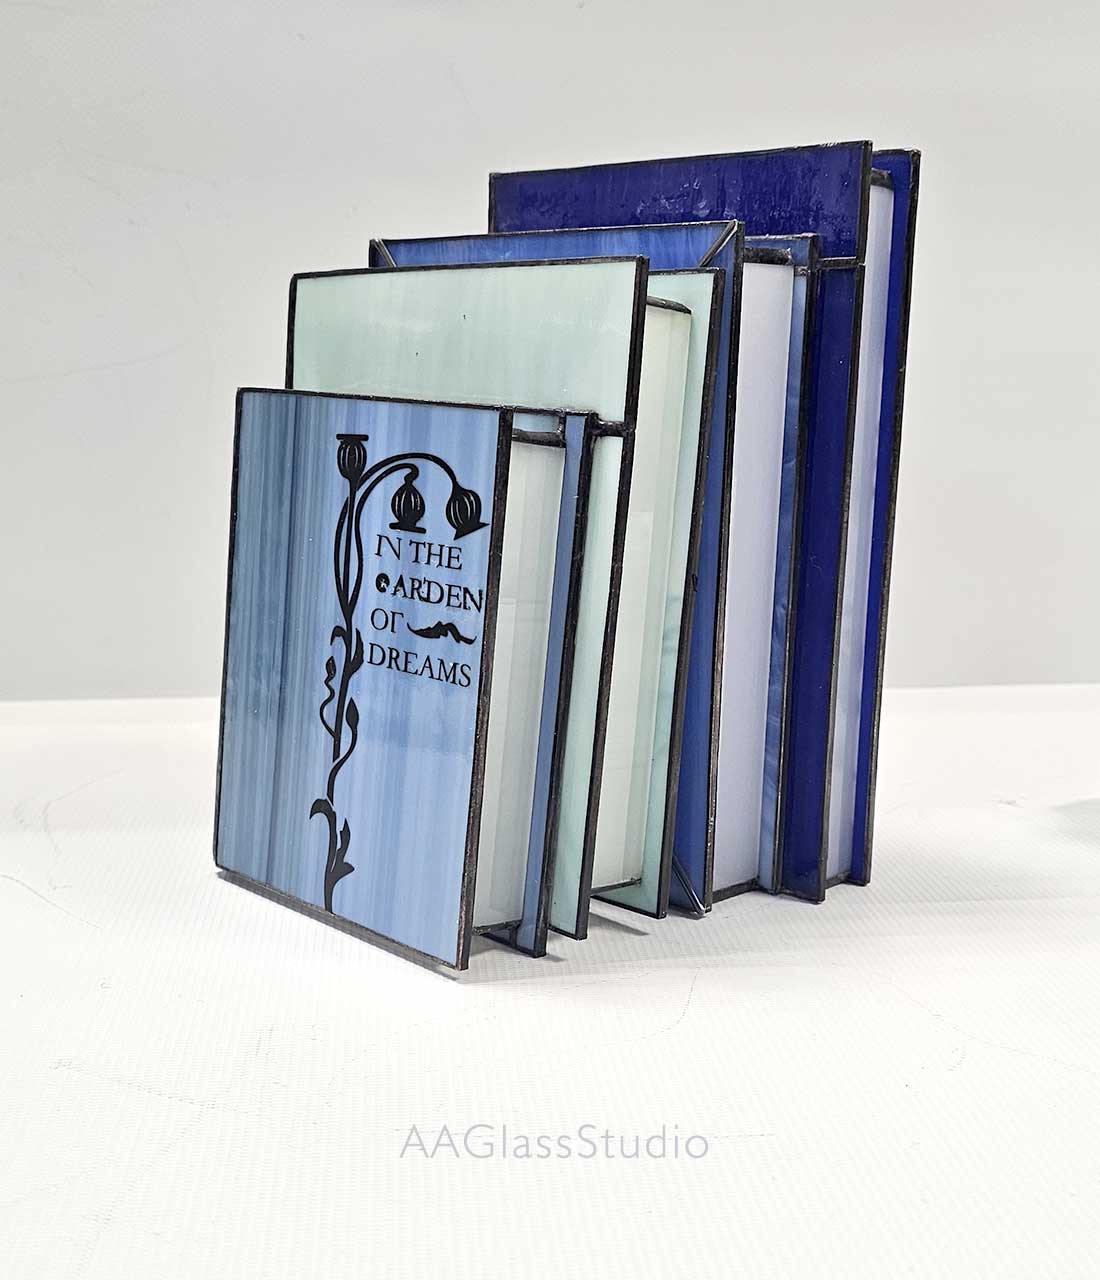
Craft a Stained Glass Books Set Full of Radiance part 1
This stained glass books set is actually our second 3D book-themed creation. If you’d like to start from the beginning, take a look at our first project—an equally charming design that’s perfect for book lovers and stained glass enthusiasts alike.
Get Ready to Create Your Masterpiece
- Print the Pattern
Download and print your 3D stained glass book pattern — the foundation of your glowing stack awaits! - Gather Your Tools
Grab your glass cutter, pliers, and soldering kit — essentials for shaping this timeless craft. - Pick Your Glass
Choose vibrant or soft-hued glass sheets to bring your stained glass book stack to life.
Assembly of Book 1
Book 1 Specifications
- Size: 5.51 x 7.87 inches
- Total book thickness: 0.98 inches
- Page width: 0.75 inches
- Number of glass pieces: 11 pieces
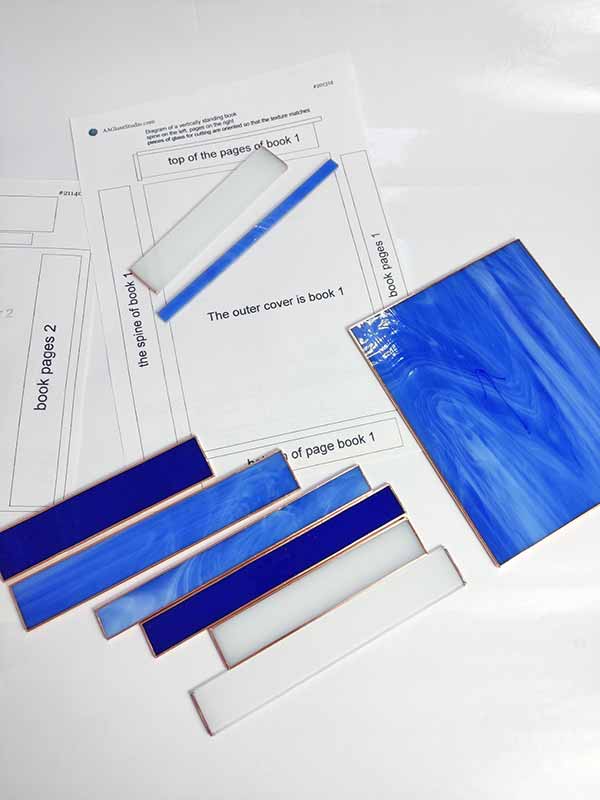
1.1 Cut and Foil the Glass Pieces
Cut the book cover and pages using your pattern as a guide. Precision is key — keep your cuts straight and clean for a polished look. Smooth the edges of each glass piece, then wrap them snugly in foil.
1.2 Build Your 3D Stained Glass Book
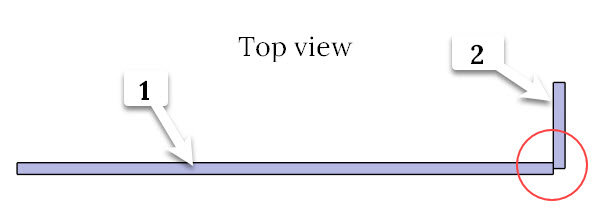
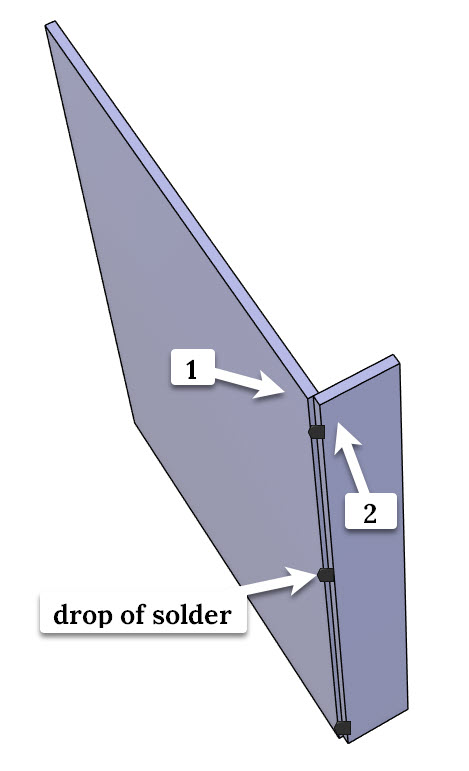
Begin by securing the cover and spine of your stained glass book with three small drops of solder. Pay close attention to how the glass pieces align — their placement sets the foundation for your 3D creation.
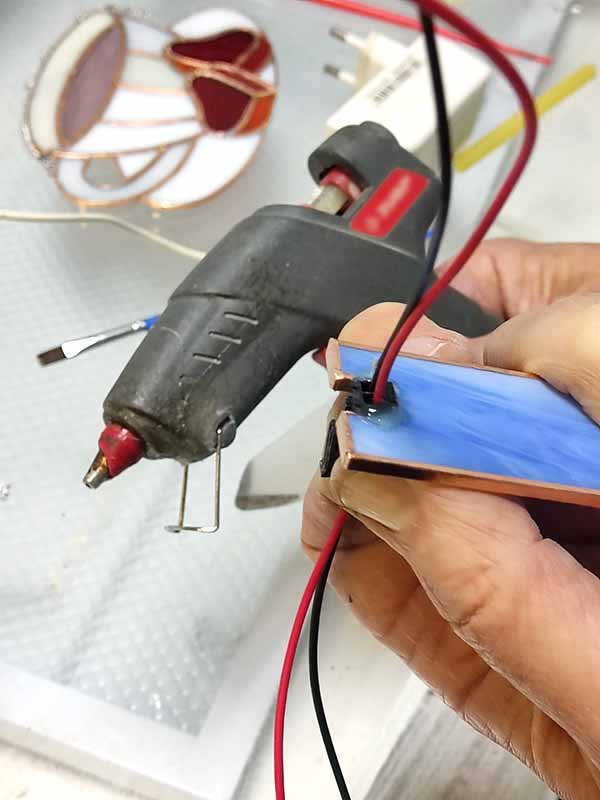
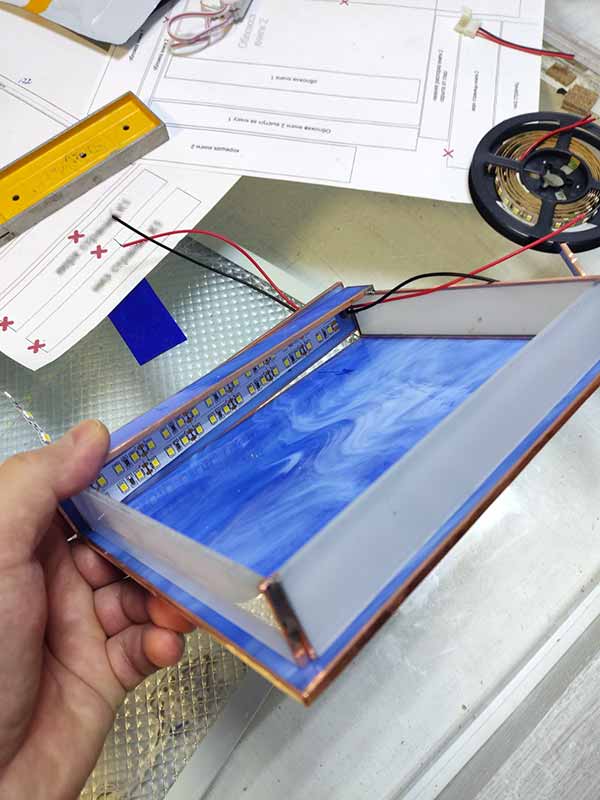
If you’re crafting a night light, attach LEDs to the inside of the spine (piece #2) with adhesive, then solder wires to the LED strip right away. Mark the wire with the “+” for easy setup later.
No need to rush and fully solder the seams yet — we’ll tack everything in place first, double-check for accuracy, then solder all seams smoothly.
1.3 Assemble the Book Pages
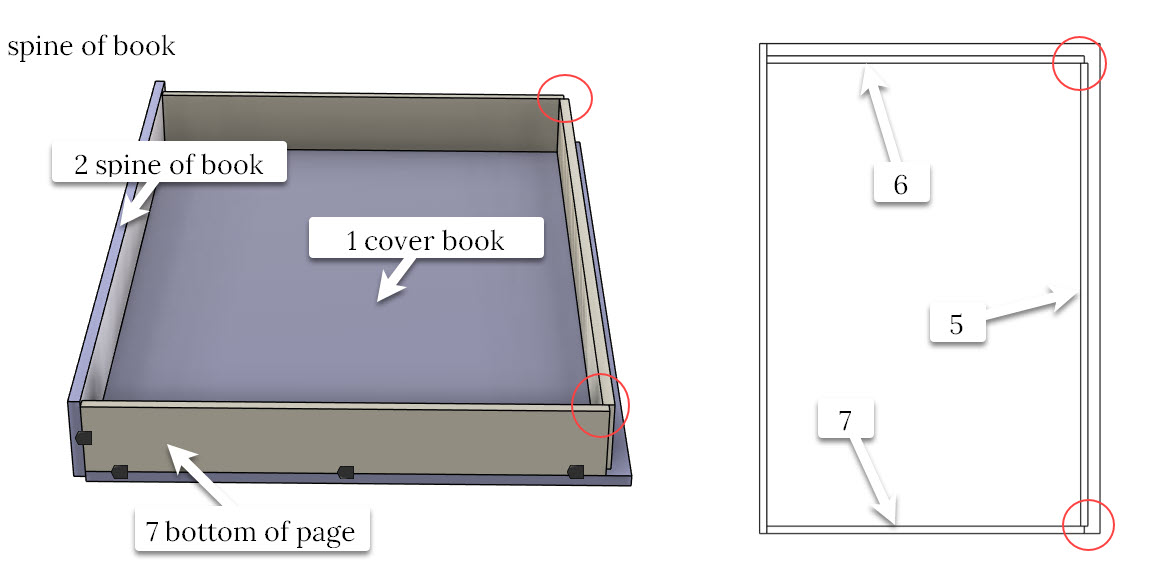
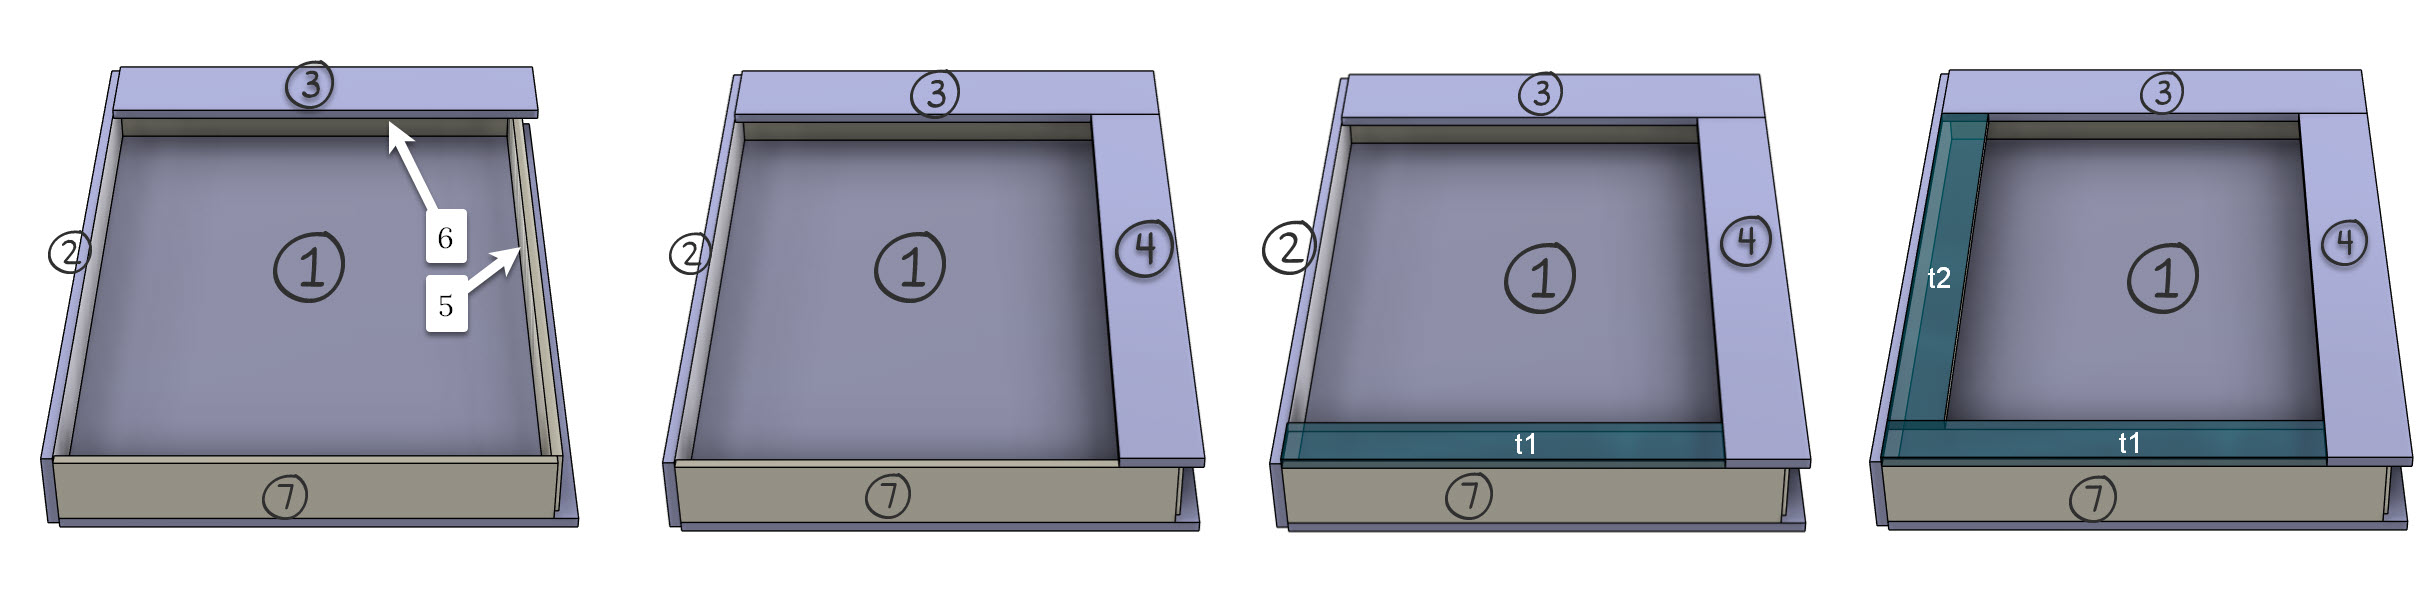
Lay the cover glass (piece #1) face down on your table, with the back side facing you. The spine (piece #2) is already tacked in place and pointing upward. Position piece #7 next and tack it with a drop of solder. This will make it easier to align pieces #5 and #6. Set these glasses in place and secure each with a small drop of solder, just like before.
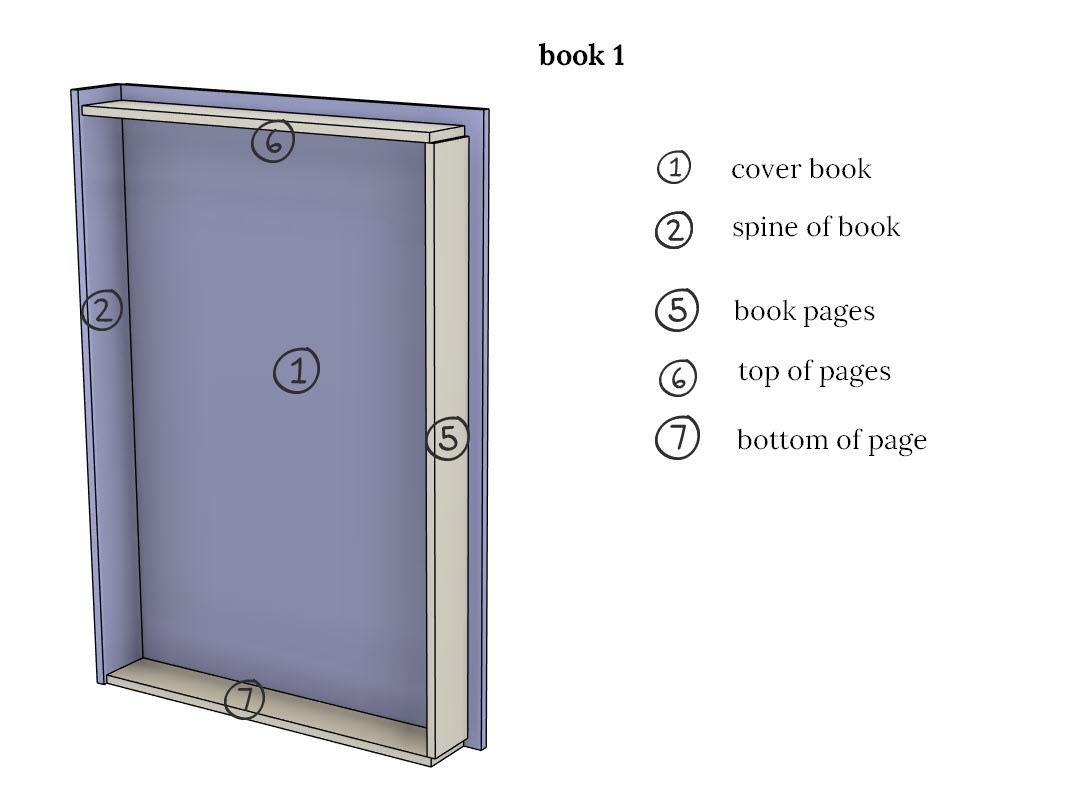
Great job — you’ve now completed the first half of your stained glass book!
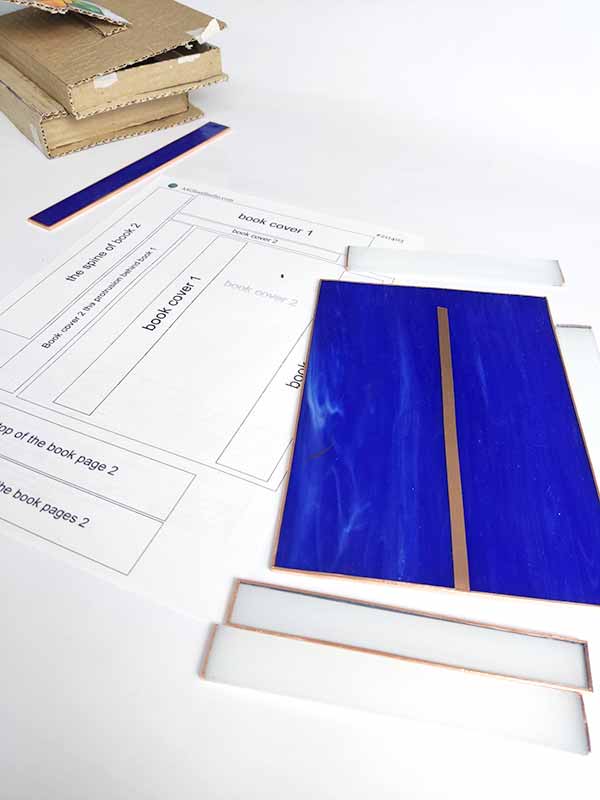
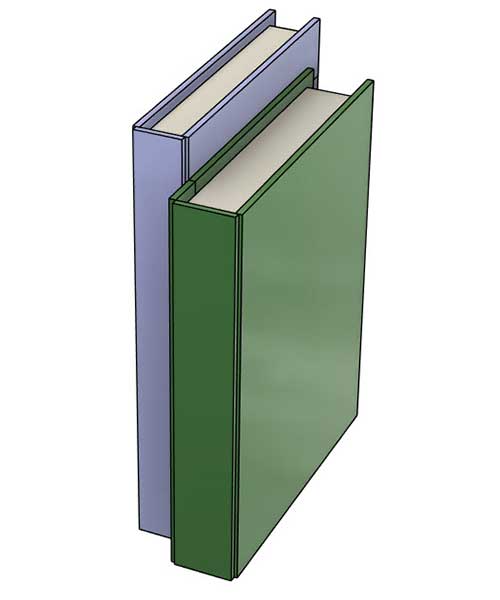
1.4 Assemble the Second Half of Book 1
Cut the glass pieces for the cover of your first stained glass book, labeled #3 and #4. Pieces #t1 and #t2 are technical glass bits to fill gaps between the two finished books. Make them from any glass matching the thickness of Book 1’s cover — I suggest clear glass if you’re adding lighting, so it shines through beautifully. Tack them in place with a drop of solder, just like the other pieces.
Once assembled, your stained glass book should look like the result in the video below.
Assembly of Book 2
2.1 Cut and Foil the Glass for Book 2
Putting together Book 2 feels a lot like crafting the first one — you’ve got this! Cut all the glass pieces for your Book 2 pattern, smooth their edges, and wrap them in foil, just as before.
2.2 Stained Glass Night Light: Prep the Book
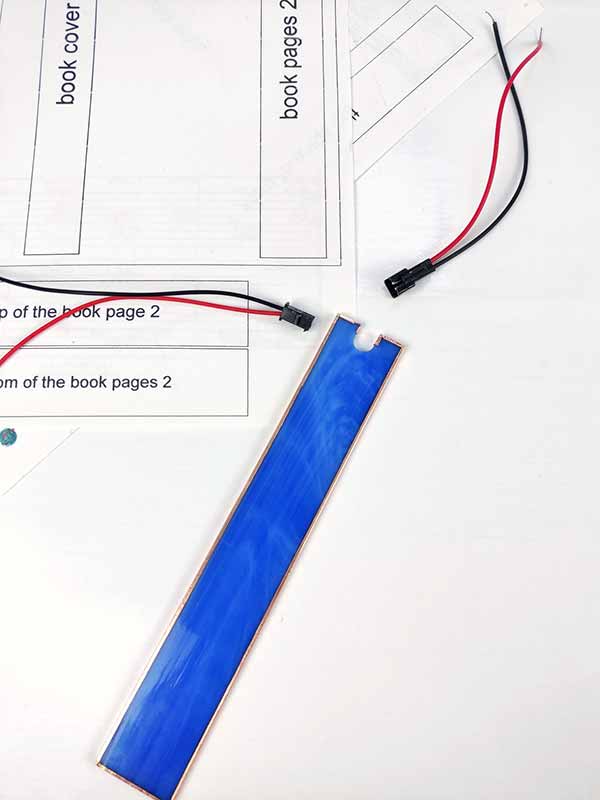
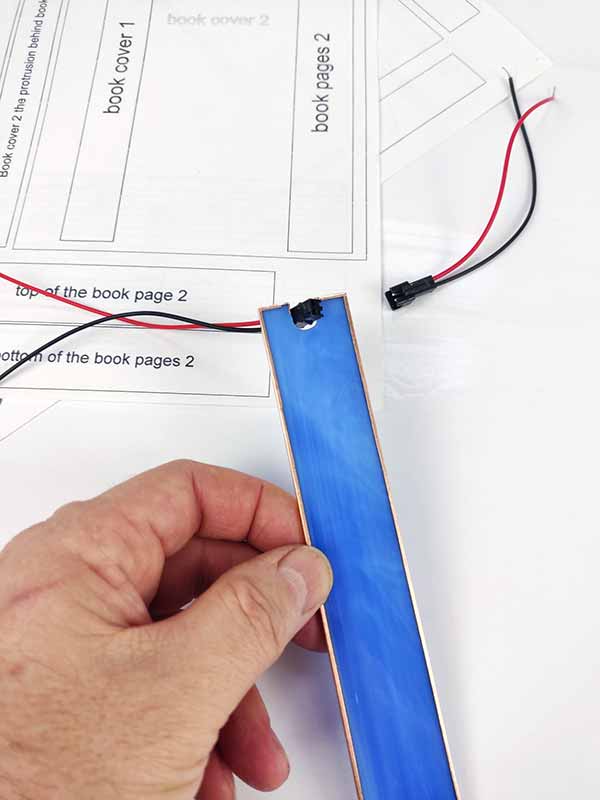
If you’re turning your stained glass book into a night light, now’s the perfect time to prep. Cut a small technical hole in the spine of Book 2 for a DC power jack. Then, attach an LED strip to the inside of the spine, ready to light up your creation.

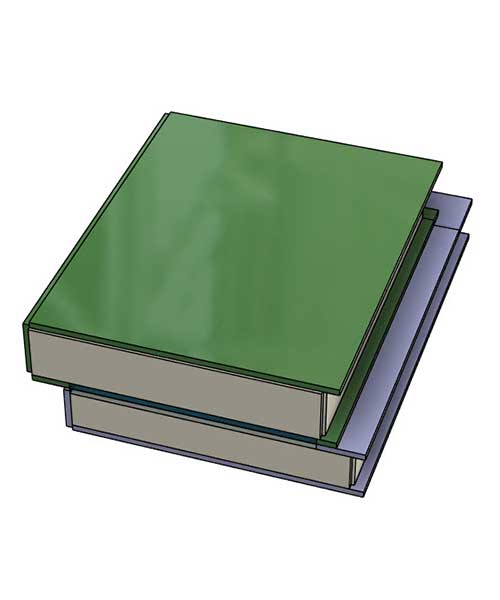
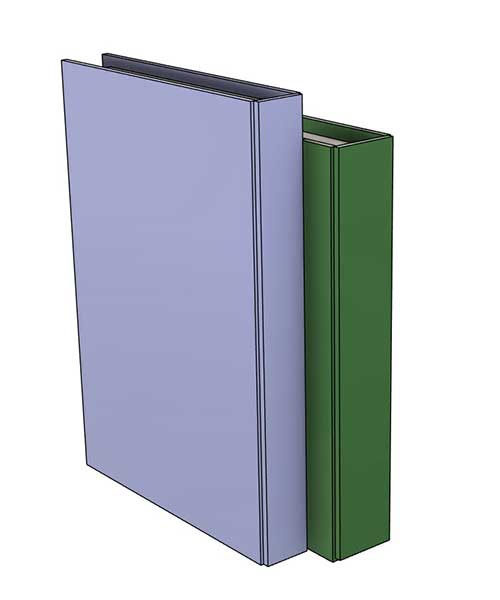
2.3 Start Building Your Stained Glass Stacked Books
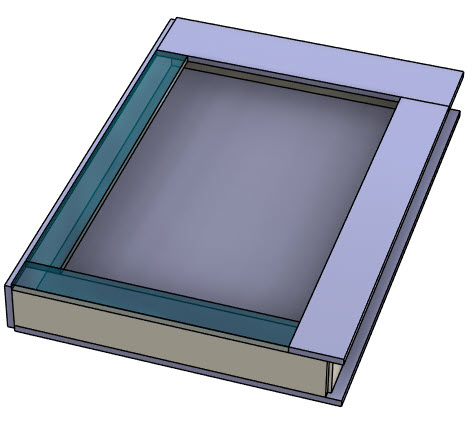
Lay your finished Book 1 cover-side down, with the opening facing up, as shown in the schematic. At this point, you can fully solder Book 1’s seams for a solid foundation — check the schematic below for guidance.
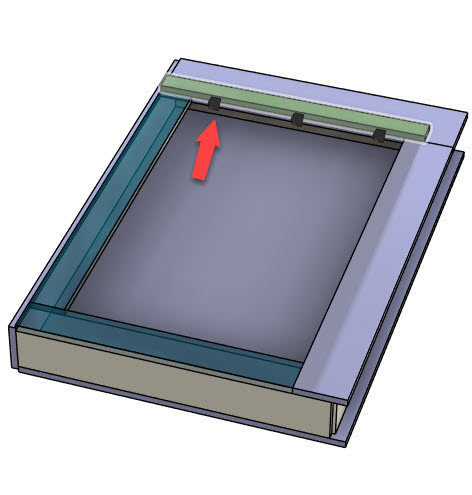
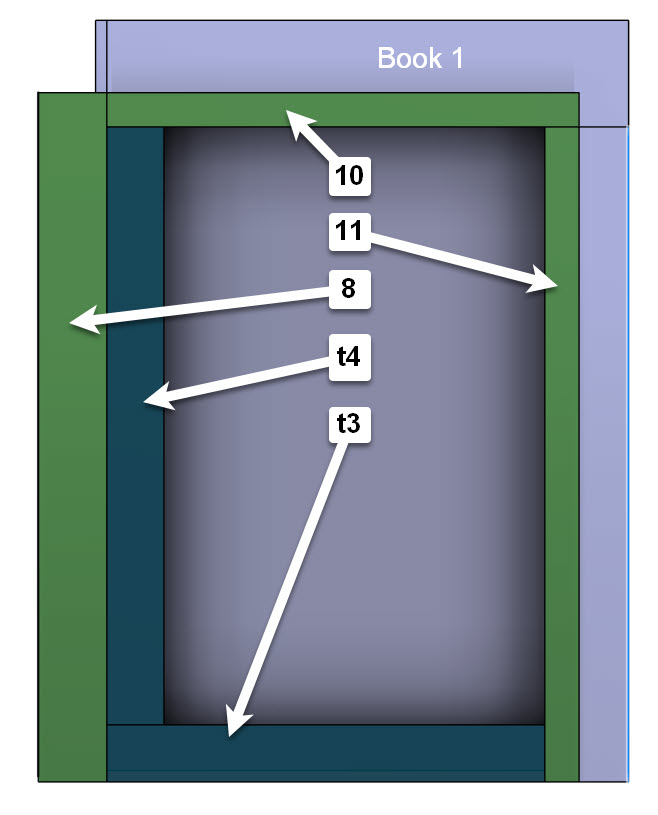
Now, begin placing the glass pieces for Book 2’s cover on top of Book 1. Start with piece #10, then #8, and move clockwise from there. The schematic below shows how to position each piece relative to the others. For now, just tack them with a drop of solder — this way, if something’s off, you can easily desolder and adjust. Watch the short video below for an animation of this process.
After watching the video, the next steps will feel clear. Here’s a quick rundown of what’s ahead for assembling your stained glass stacked books.
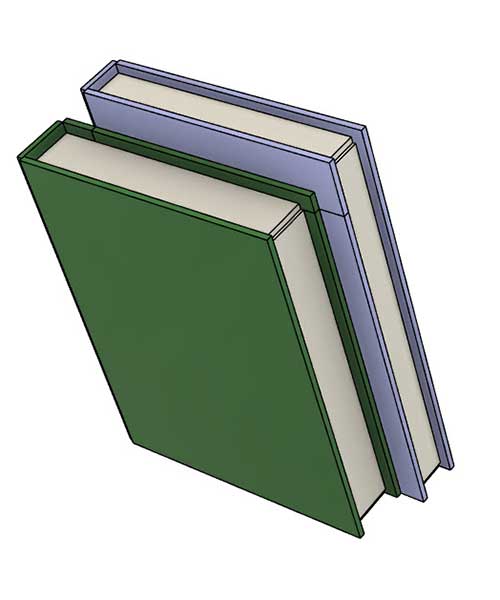
2.4 Assemble the Pages of Book 2
Align glass piece #12 flush with the edge — check the circle with an arrow on the schematic for guidance. Tack it in place with three drops of solder, then lay out the remaining pieces clockwise. See the schematic below for how to position each one relative to the others.
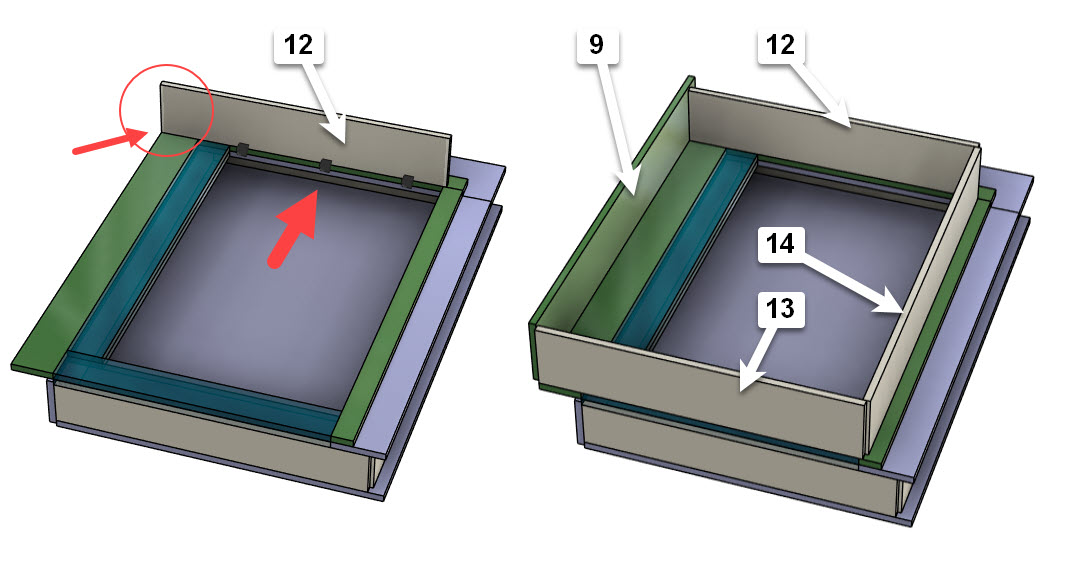
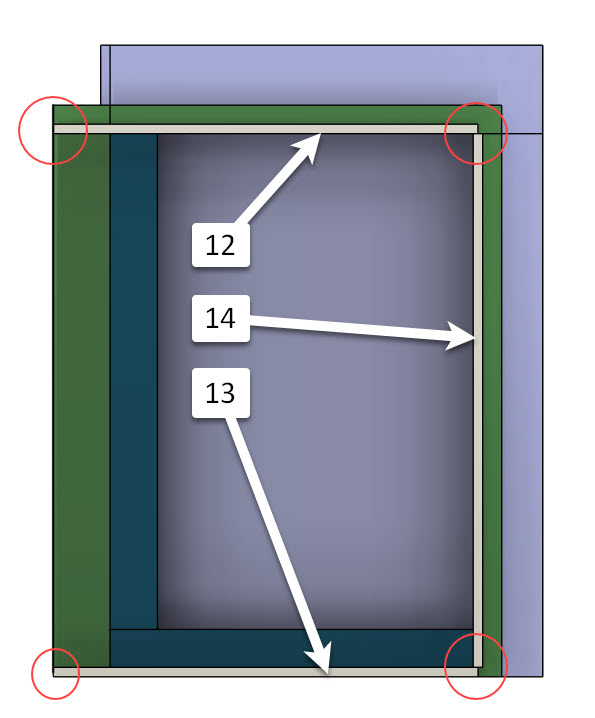
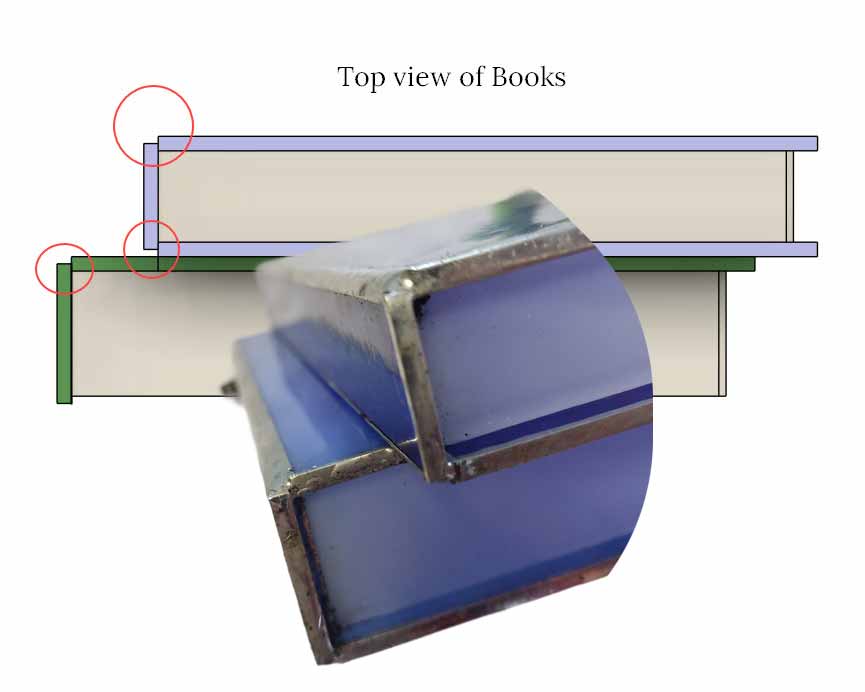
A quick reminder: the spine of your stained glass book should overlap as shown. This overlap creates a smooth, rounded seam, making the connection strong and sturdy.
2.5 Bring Book 2’s Cover to Life
In this project, we crafted simple covers for Books 1 and 2 from solid glass sheets.

Want something more intricate? You can level up your stained glass book covers with our bonus cover design files, available separately.
Or let your imagination run wild—add flair by decorating the cover with foil accents.
If you’re making a night light, double-check that you’ve connected the LED wires to the power jack. Before soldering the Book 2 cover in place, fully solder all seams for a polished finish.
Then, patinate, clean, and get ready to snap photos of your stunning creation!.
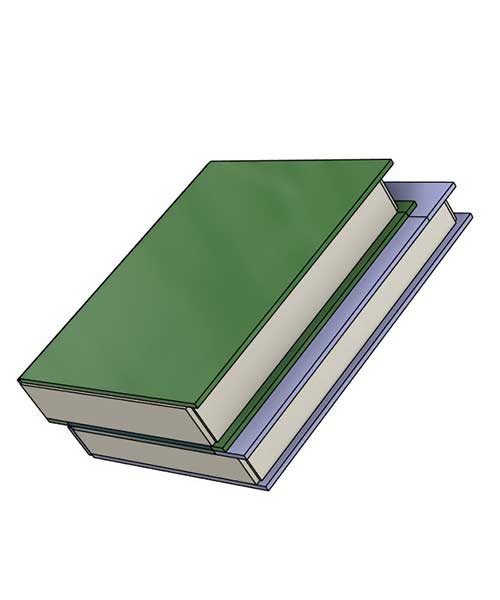
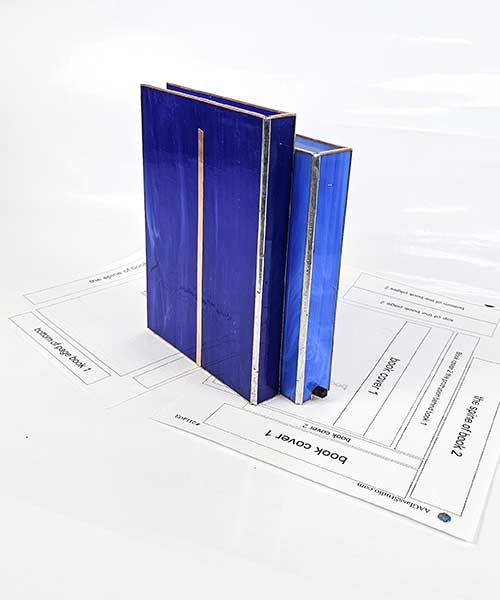
2.6 Unveil Your 3D Stained Glass Stacked Books
3. Conclusion
Congratulations—you’ve journeyed with us to complete the first part of your stained glass book stack! We hope this mini-guide made it fun, simple, and rewarding. Ready for more? The second part of this project awaits you here. Happy crafting, and enjoy the glow of your handmade masterpiece!
Explore Another Creative Stained Glass Books Set Project
If you enjoyed making this stained glass books set, you might also like another delightful project featuring a stack of books in a different style. It’s just as beginner-friendly and adds a unique touch to your collection.