
How to make a Christmas house (pattern #1 from the Christmas Village series?
How to make a 3D stained glass Christmas house
I am telling my experience of assembling according to this pattern, but this does not mean that you need to do it only this way and in no other way. Each master has his technique for making stained glass, his acquired skill. I will tell and show my approach to assembling a 3d glass object. You can safely experiment and do as you like. The main thing is to enjoy what you do!
Stages of creating a house
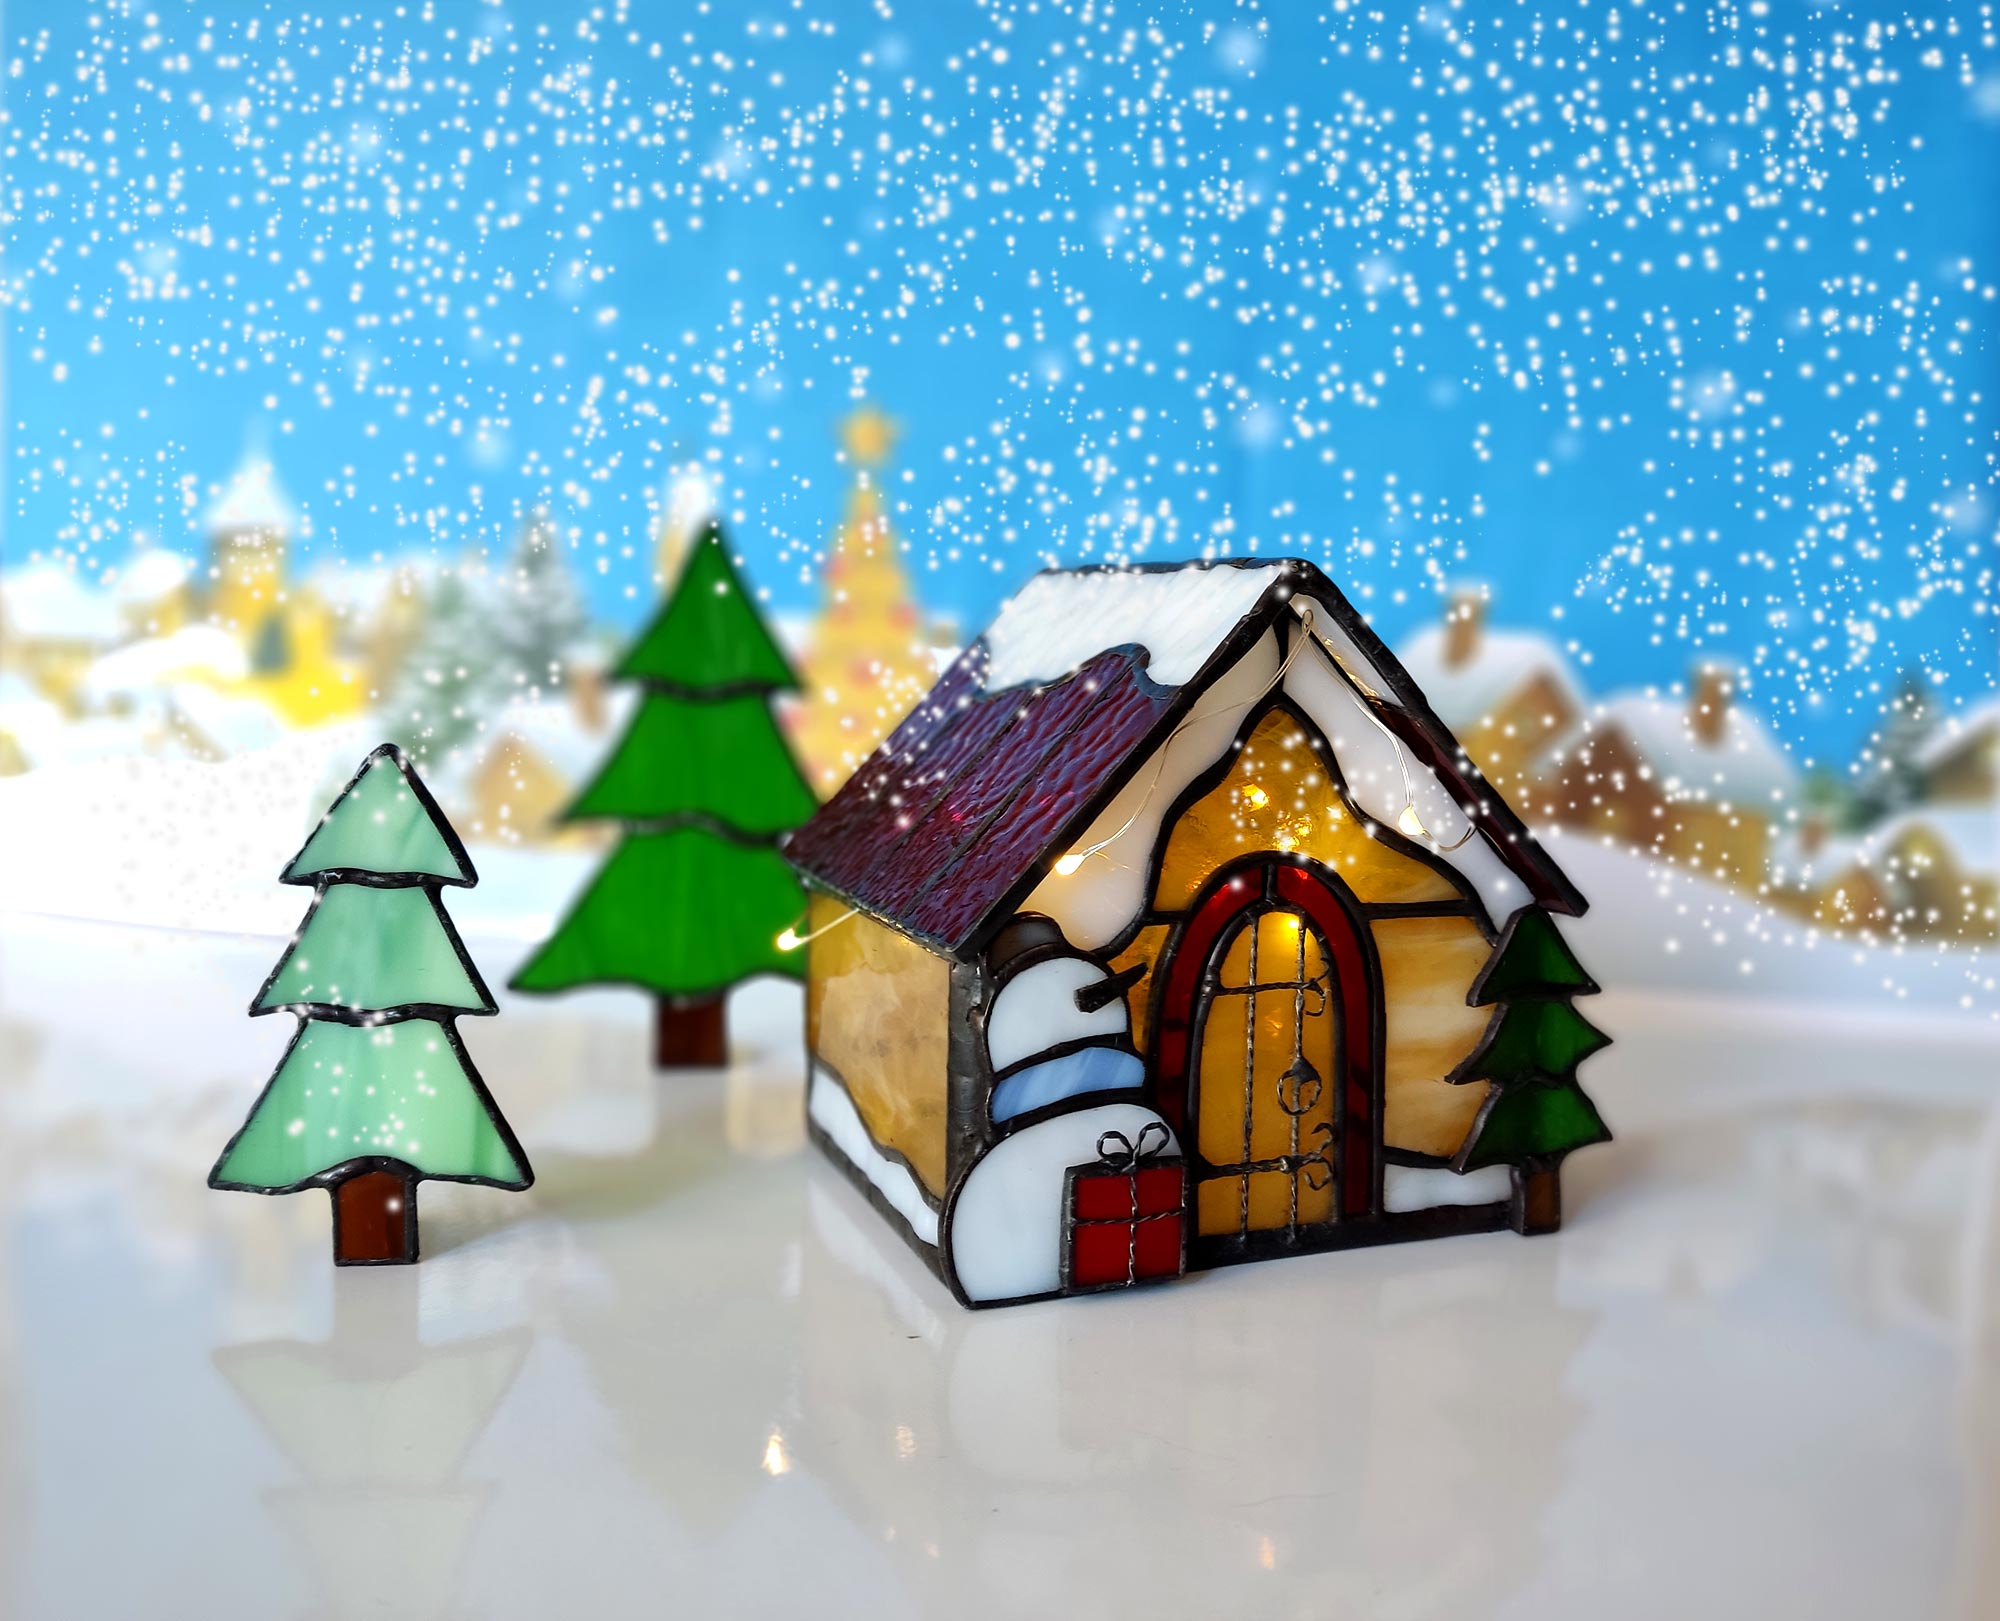
The house model consists of two main objects: the house building and its roof.
We will make them sequentially and connect them at the final stage. We decided to remove the roof to put an LED strip there and make the house glow and cozier.
Let’s get started.
Print out your purchased pattern.
Prepare the tool and glass.

I am making the body of a glasshouse.
First of all, we make the body of the house – its basis. The walls are the simplest details in this project.
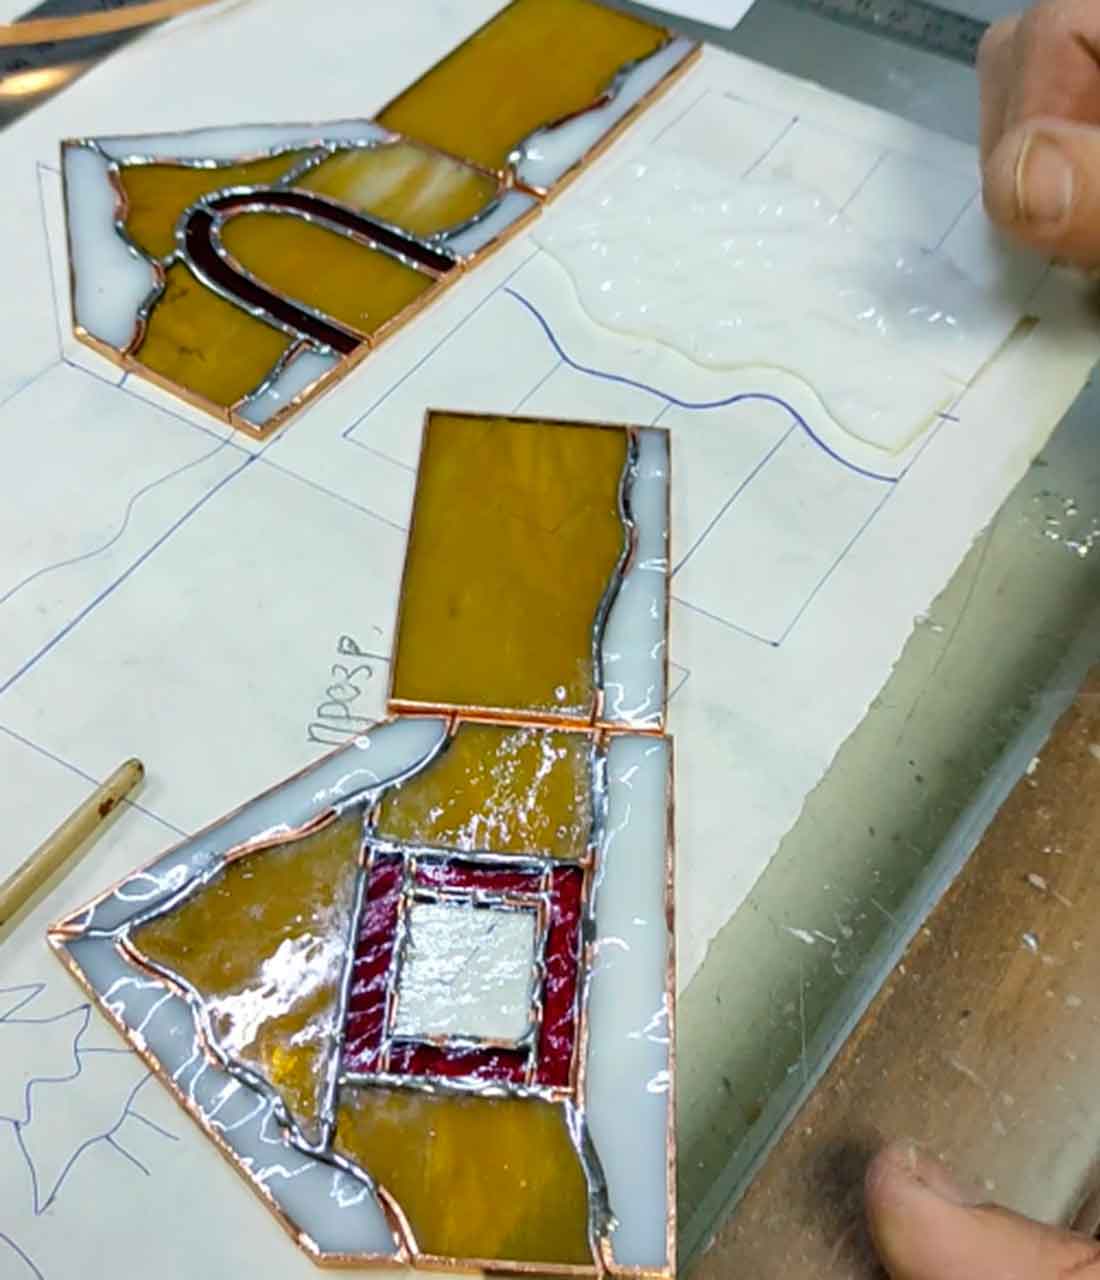
According to the pattern, we cut the glass for the building of the house.
Foil-sliced pieces.
At this stage, we have to get the flat sides of the building.
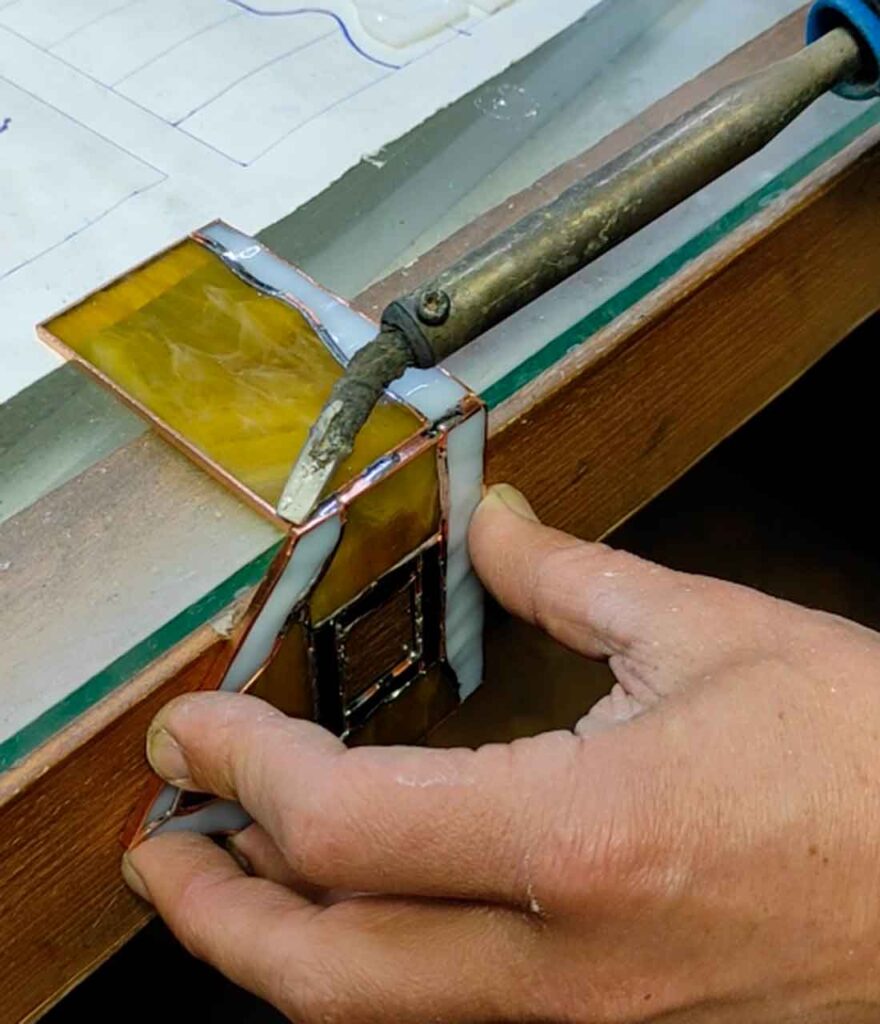
The next step is to solder the pieces of each side together. Thus we get the whole side of the house.
We begin to solder the planes together to get a building box.
And how would you solder two planes together at an angle of 90?
You see my way in the photo. If you know the course better, do it your way.
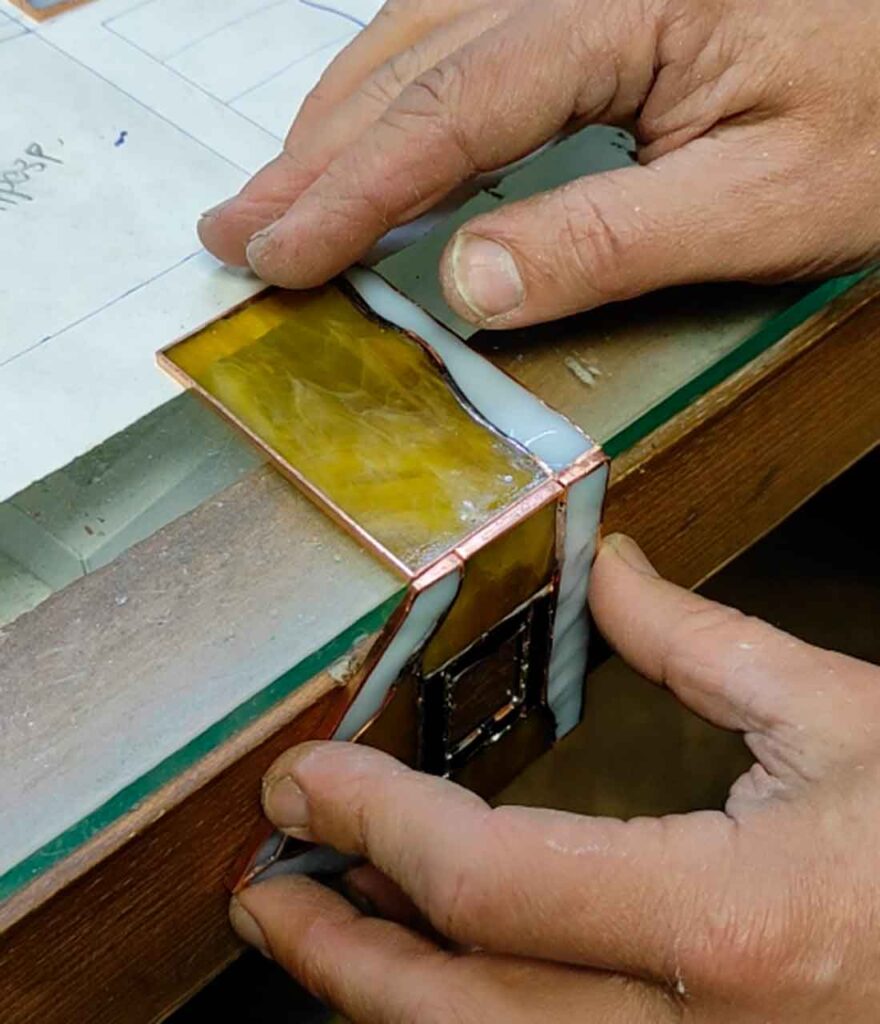
We collect the box at home.

Making the roof of the house
First, we try on the glass to understand what approximately the size of one side of the roof will be. You can make it at the same angle as the main corner of the house, or you can make it sharper.
It is essential to adjust the details of the roof at 45 degrees to each other. This method will help make a beautiful and thin seam and maximum fit of the parts to each other. First, we cut out the details to fit the desired size, sharpen the sides at 45 degrees, and foil. Then, we applied it again and checked if everything worked out. To do this, you can grab minor tin parts (literally three dots) and put the roof on the base (box) of the house. If everything is in order, we solder the crash and connect it to the house’s floor.
The final stage
After we have assembled the house, we proceed to our details.
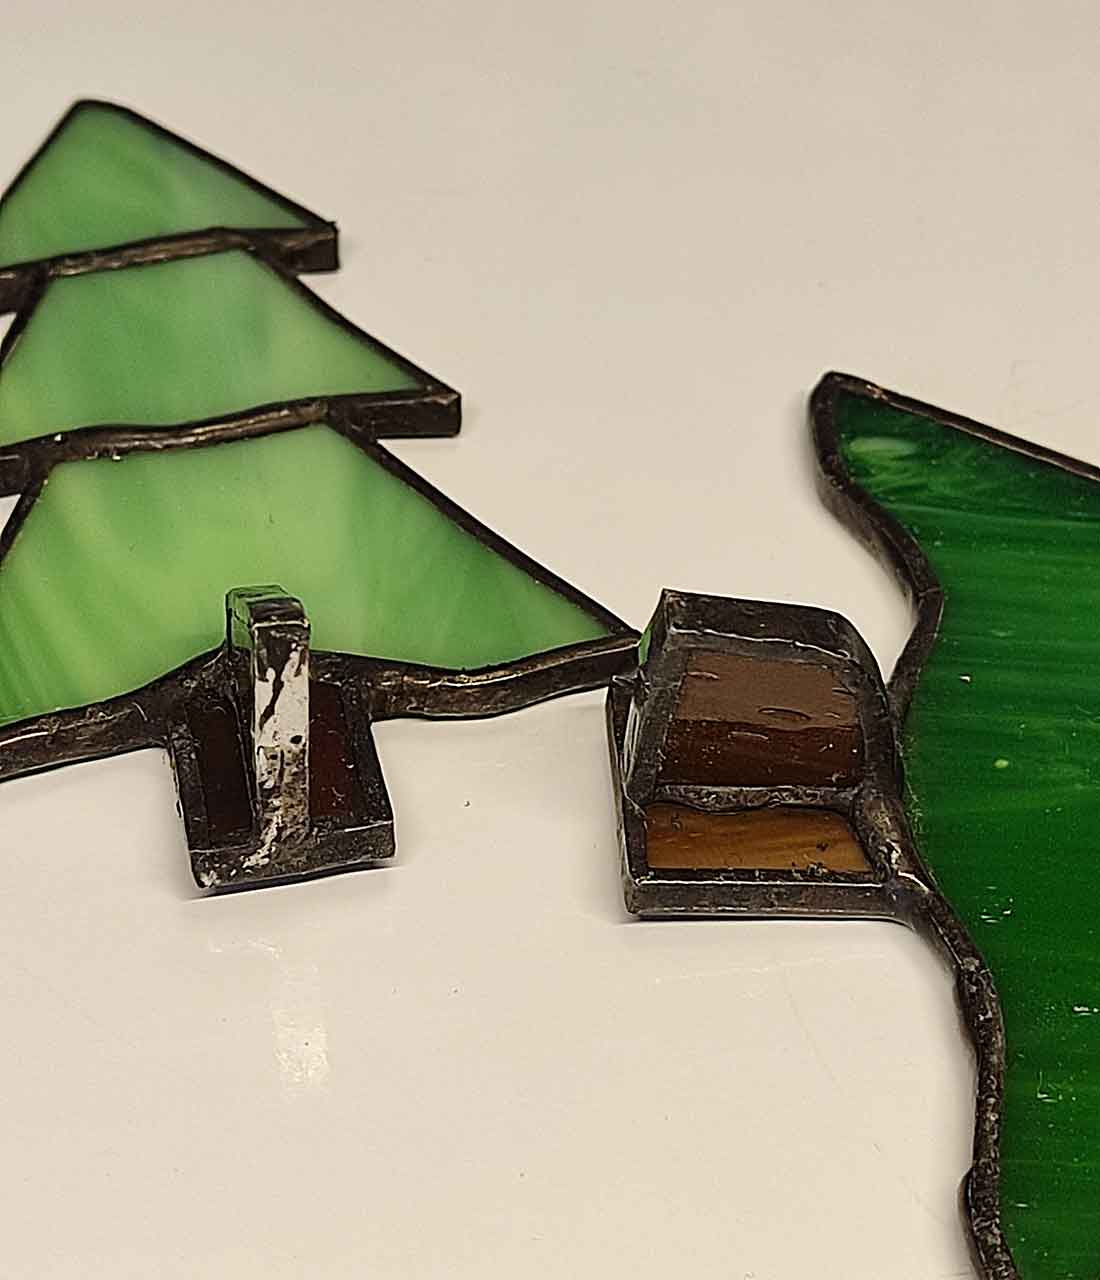
It’s pretty easy to make a snowman and a Christmas tree. The only thing we would like to draw your attention to is the Christmas tree trunk, which will stand separately. It is very convenient to expand so that the tree will be more stable.
We also draw your attention to how we made a snowman’s nose – it’s just a piece of foil cut out and covered with tin. And it turned out to be such a beautiful carrot nose.
I would also like to tell you how to make a gift.
The gift is just a square of glass, and everything is accessible here.
The most exciting thing is his bow. We made it out of wire, twisting it into a pigtail and wrapping it in a bubble.
Decorations on the window and door are made according to the same principle. Thanks to the wire, it turned out to create a pattern on the door and a handle.
Hello – I purchased this pattern from you and would really like to get a copy of theses directions with pictures. Please let me know how to do that. Thanks
Hello Susan! Thank you for reaching out and for your purchase! I’m happy to help. I’ve already updated the pictures in the post, so you should now be able to see the corrected images included with the instructions. Thanks for bringing this to my attention, and happy crafting! 😊