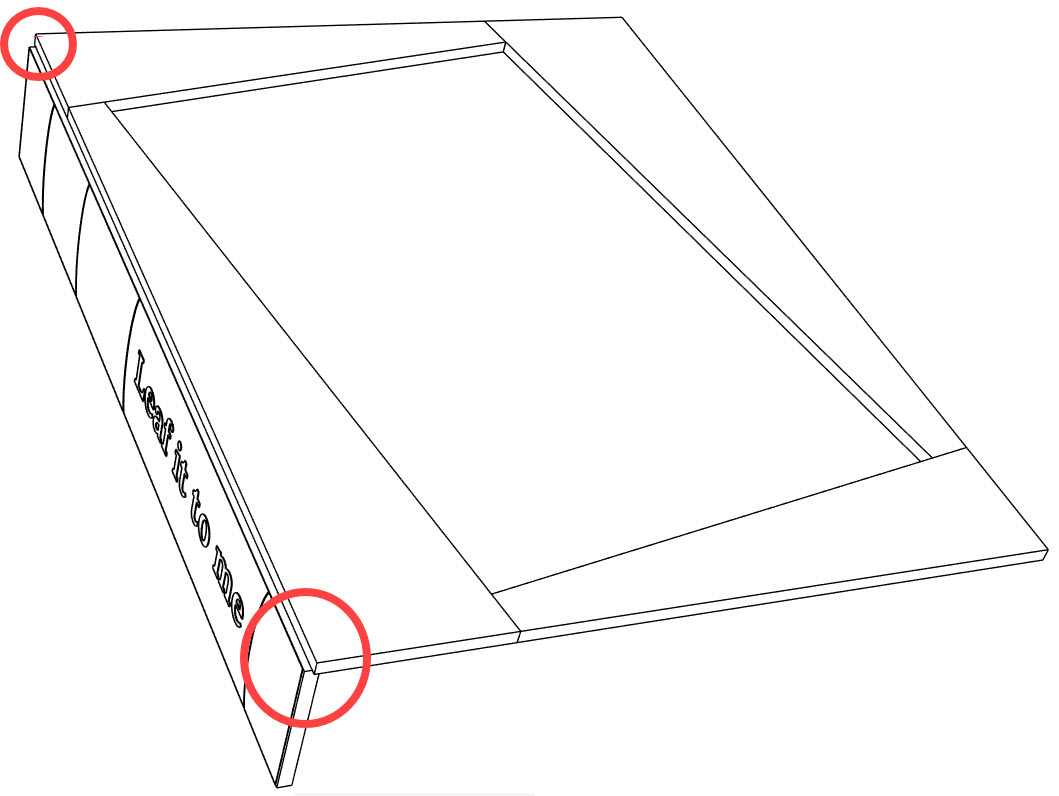
How To Make 3D Stained Glass Books – Easy Step-by-Step
Stacked Glass Books Assembly Instructions
Initial Preparation
- Cut glass pieces according to your pattern.
- We recommend using translucent glass, especially if you plan to add backlighting.
- Wrap each piece with copper foil.
- Solder the panels (covers and spines of the books).
Assembly Process
Once all pieces are prepared, begin assembling the books.
1 Creating the Cover
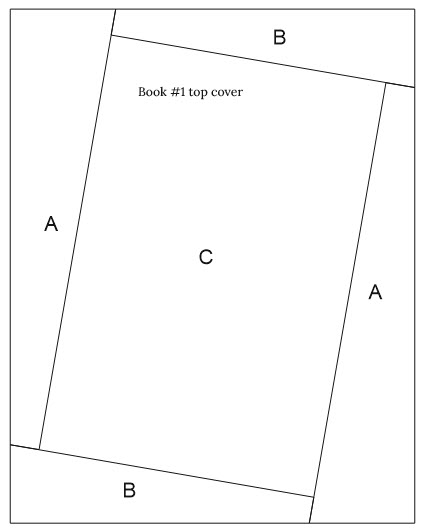
Start with making the cover. You decide what pattern (or no pattern) will be on the cover of the upper book (2). We’ll begin making book 1.
1.1 The cover of book 1 consists of 5 glass pieces, 4 of which are the same color:
- Fragment A: matching glass pieces
- Fragment B: matching glass pieces
- Fragment C: we recommend making this from clear transparent glass. This will make your books look visually better and more airy.
2 Attaching the Spine to the Cover
Solder the book spine to the cover. It’s important to position these two panels correctly relative to each other.
2.1 The cover is placed on top of the book spine, overlapping by half the glass thickness. Small gaps of approximately 1/25″ (1mm) will remain on the left and right sides.
2.2 Four tack points with solder will be sufficient to connect them.
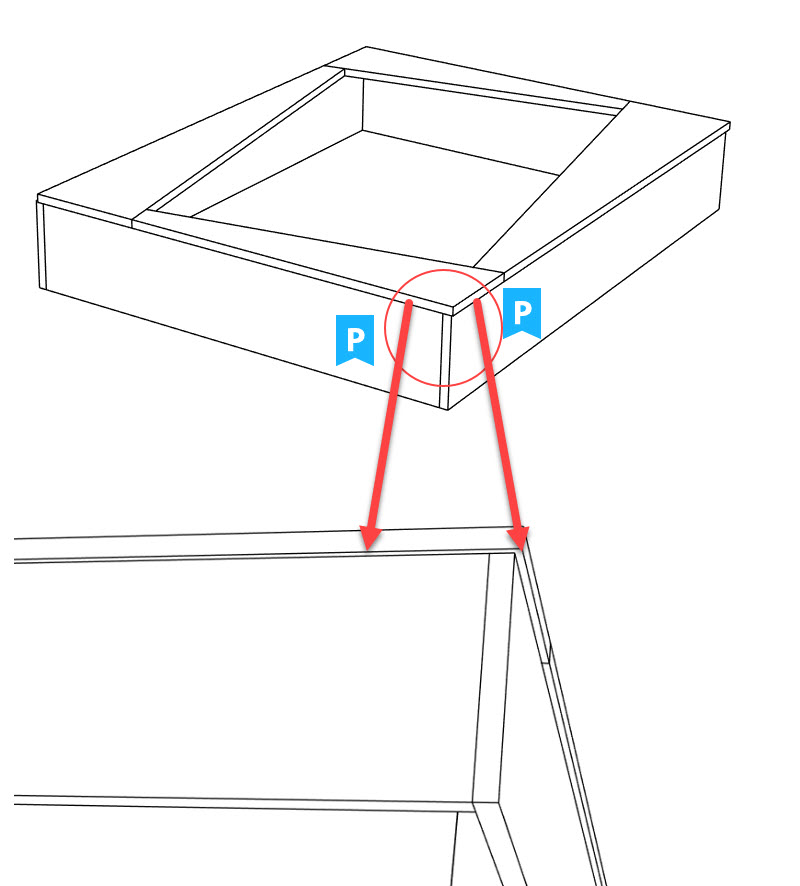
3 Attaching the End Glass Pieces
Next, solder the end glass pieces of the book to the construction from Step 2. There’s also a nuance here.
Glass “P” (pages) should be positioned flush with the edge of glass “S” (spine), meaning without any overhang.
Complete the book box assembly with the last glass piece.
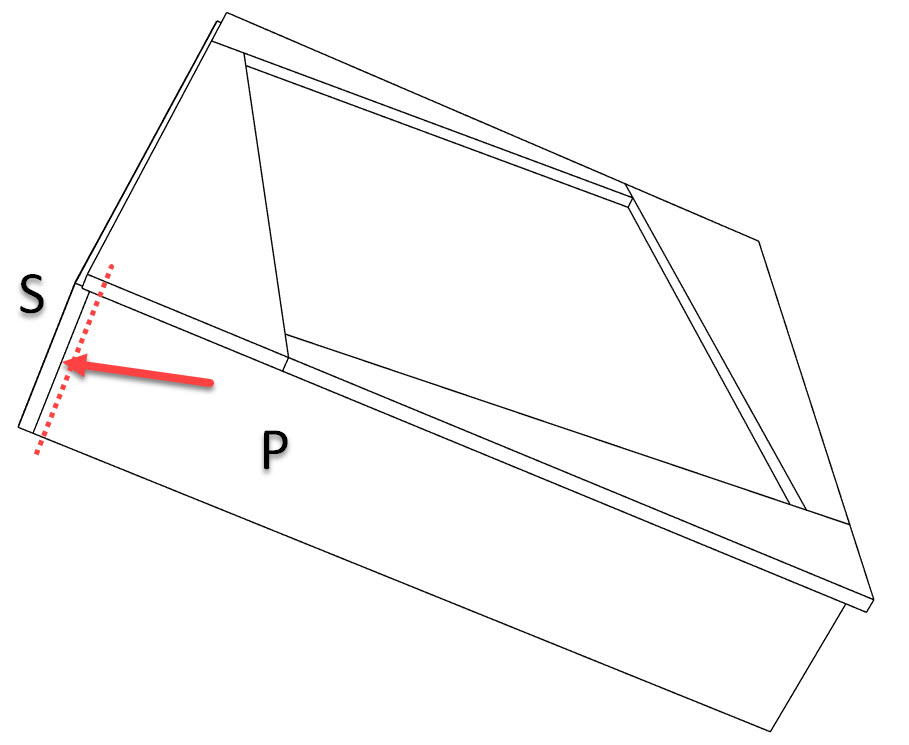
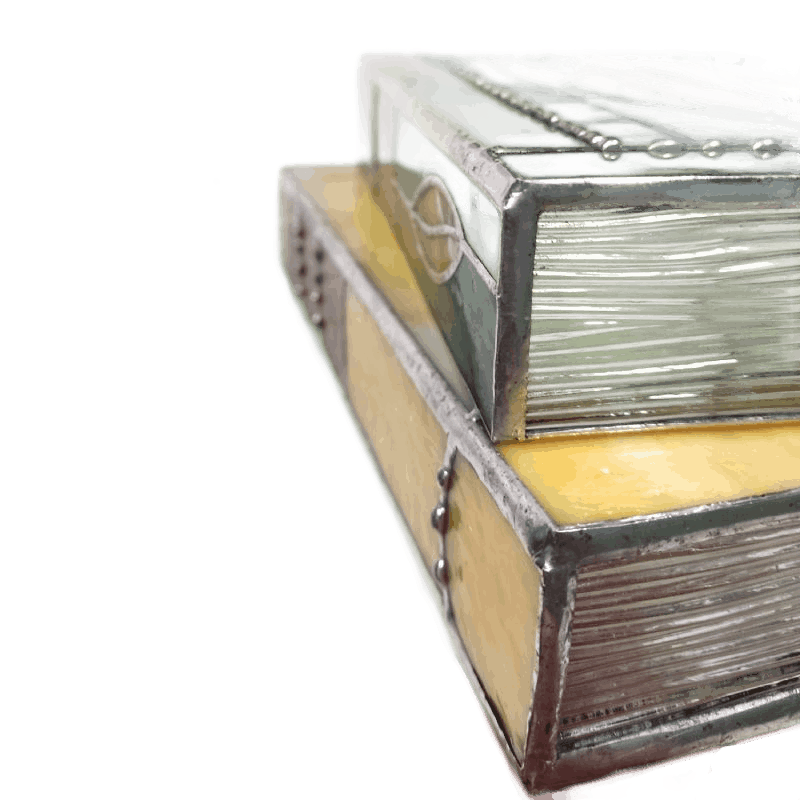
4 Result Check
As a result, we should have the following:
- a) The book spine protrudes by half of its glass thickness from the book cover.
- b) The glass pieces representing book pages are all soldered flush with each other, and the cover extends beyond them by approximately 1/25″ (1mm).
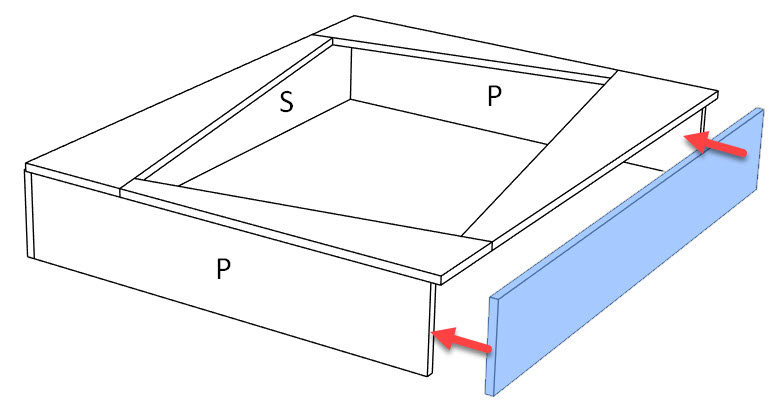
5 Attaching the Transparent Bottom
Solder the transparent bottom to the finished box.
Position the bottom the same way as the cover. The book spine protrudes from the bottom by half its thickness, all other glass pieces by 1/25″ (1mm).
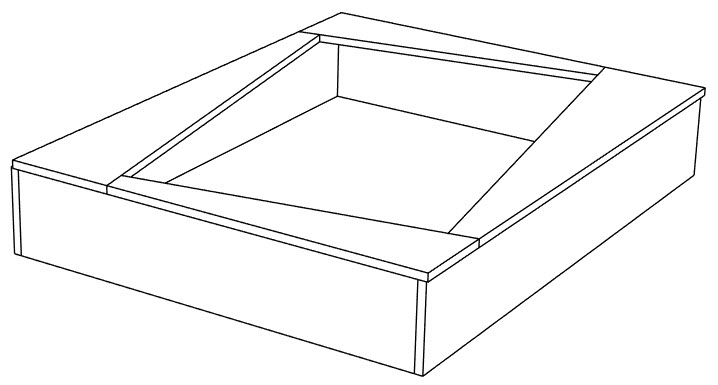
6 Final Soldering of Book 1
After checking and making sure everything is done correctly, fully solder the seams on book 1.
All this is done so that the book seams are neat and beautiful. And where the spine meets the cover, you’ll get a nicely rounded connection.
7 Assembling Book 2
Repeat these steps for the upper book (2) up to Step 4. This book has no bottom!
8 Final Soldering of Book 2
After checking and making sure everything is done correctly, fully solder the seams on book 2.
9 Decorative Soldering (Optional)
Decorate the seams with decorative soldering, if desired.
10 Cleaning and Patina
Don’t forget to wash and apply patina to both books before joining them together.
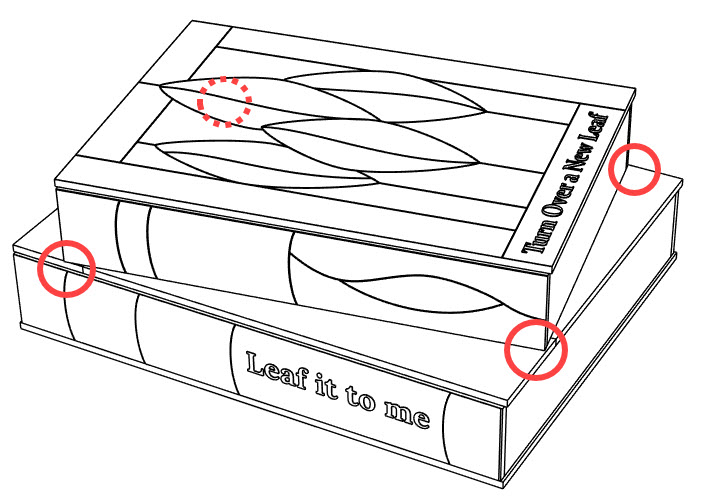
11 Stacking the Books
Place book 2 (smaller) on top of book 1 (larger) and position as shown in the diagram. Tack solder the upper book at the corners. These 4 attachment points will be sufficient.
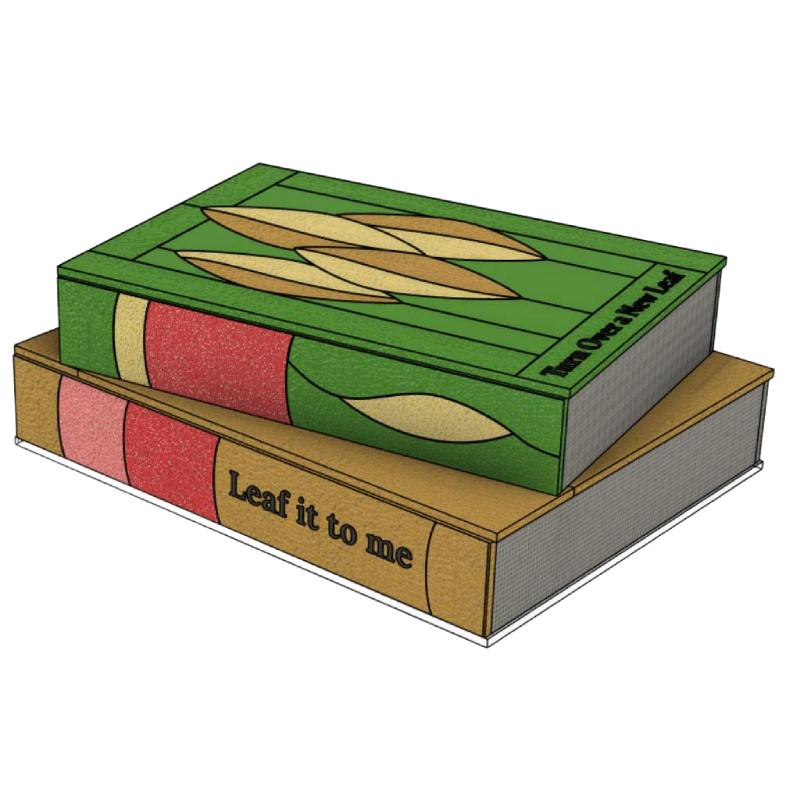
Your Stack of Books is Complete!
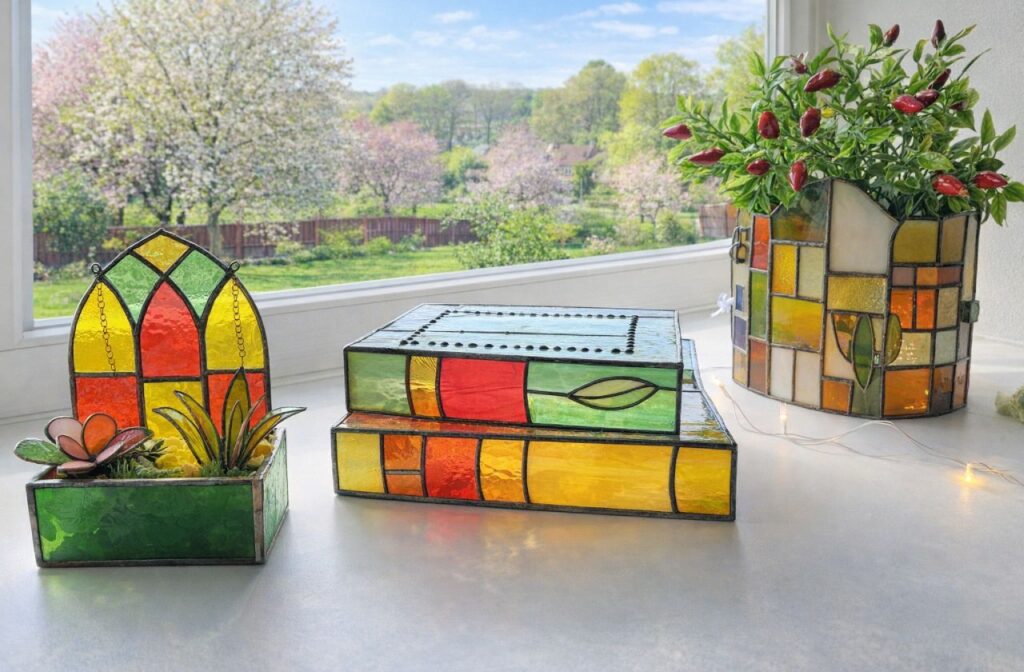
Now come up with titles for your books and label them. We made our titles from vinyl film cut on a Cricut machine.
Tips for Best Results
- Use translucent glass for the best light effect.
- Take your time with positioning; accuracy is key.
- Clear glass in strategic places creates depth.
- Don’t rush the soldering until you’re certain of placement.
- Clean thoroughly before patina application.
- Consider adding LED backlighting for a stunning display.
Ready to Start Crafting?
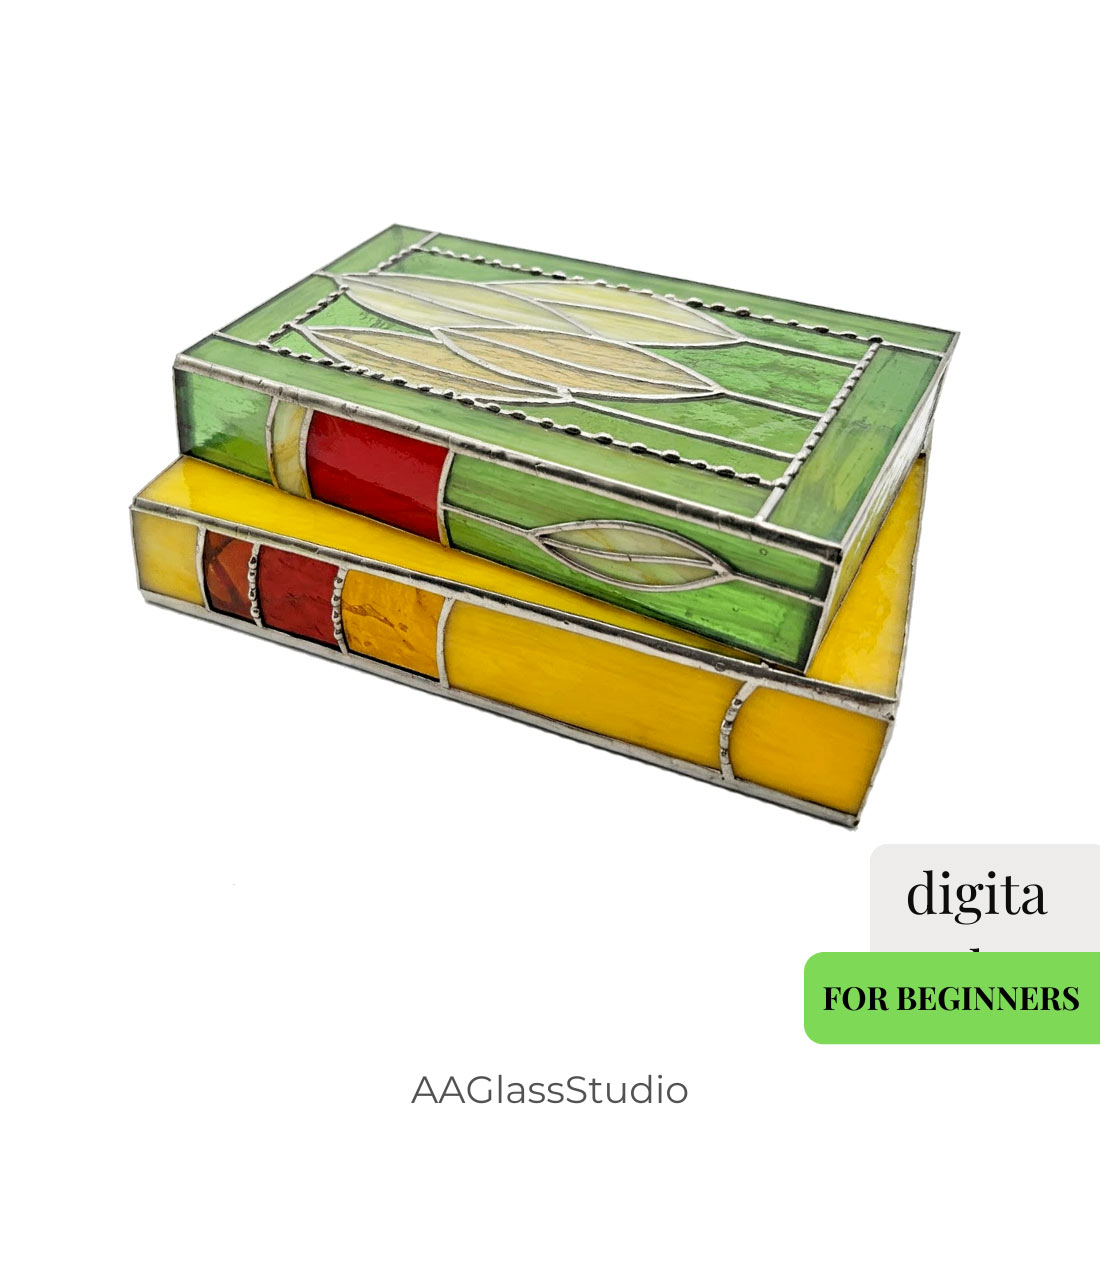
You can purchase the exact digital pattern used in this tutorial to create your own beautiful glass books right here: 3D Stained Glass Books for Beginners.
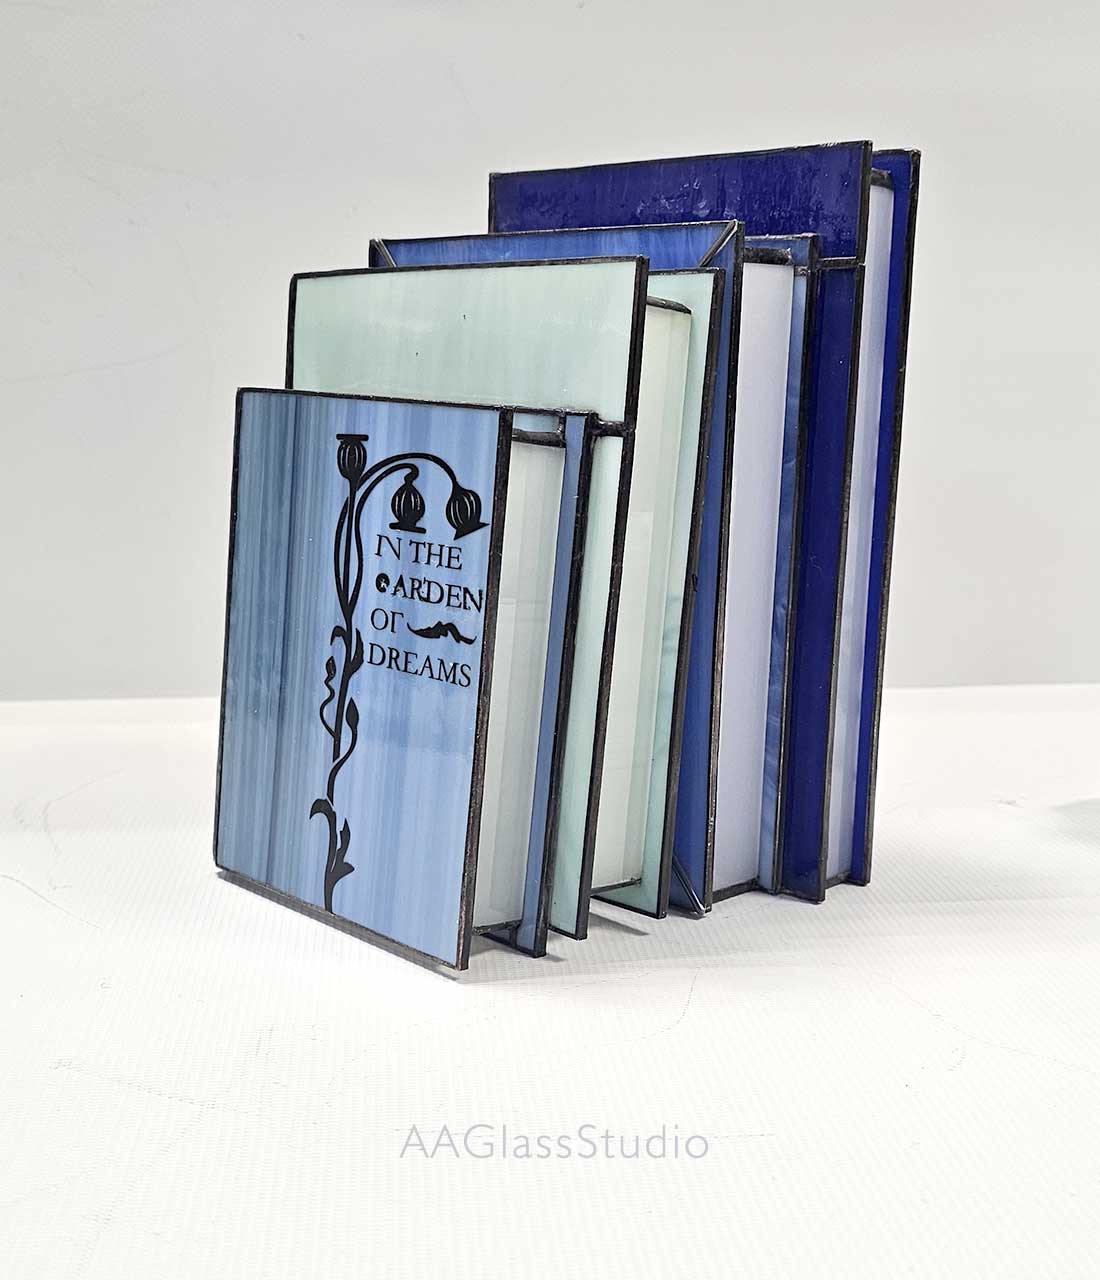
We also have an advanced pattern for a stunning stack of 4 books that can be turned into a functional lamp! Check out the 4-Book Lamp Pattern. It’s a breathtaking project, and you can see photos of the magical glowing final piece in its dedicated Step-by-Step Assembly Instruction. Don’t miss the chance to see how incredible these glass books look when illuminated!