This version is for beginners in 3d stained glass.
Simple geometric shapes, minimum details, maximum effect of the finished product.
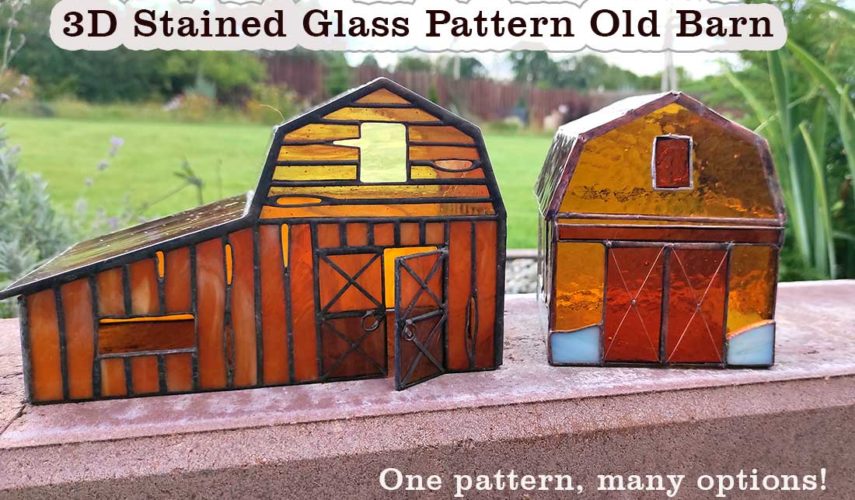
First, we modeled the barn in a 3d modeling program, then we made a 3d model out of paper, checked that everything was going, and made a stained glass pattern according to which we assembled the shed out of glass.
PREPARING THE PATTERN AND CUTTING PARTS
Print the pattern
We cut the details according to the pattern
For a good visual effect, the roof glass should be slightly darker and slightly denser.
The gate can be made overhead or flat, if desired.
The sample of the shed was made from the remains of glass, so the side planes of the shed consist of pieces of glass that I had.
Manufacture of shed planes. (like an ordinary stained glass window made of foil)
If you have chosen to make overhead gates, then I recommend patinating and washing the front part before soldering the gate to it.
Beam, gate and snow – solder together beforehand.
ASSEMBLING OLD BARN STAINED GLASS
Assembling a 3D structure is not difficult.
You can use a box to set the corners of a three-dimensional structure.
Walls are assembled first.
Then the roof.
Advice from our followers
If you are having difficulty soldering 3d structures, glue them together!
Where you can’t solder finished flat panels, just glue them together, pre – tinned.
FINAL 3D STAINED GLASS
LICENSE TO USE
It is allowed to sell products based on this pattern, whether you make changes to it or not, it does not matter;
The sale of products is allowed at various sites;
The resale and transfer of the pattern is prohibited;